How to Grow Celosia / Cockscomb for the Cutting Garden
Celosia - know by its common name of ‘Cockscomb’ given the appearance of certain varieties - is a wonderful flower to grow as a cut flower. Easy to grow from seed, low maintenance, growing vigorously and without much issue even in extreme heat and humidity and lasting forever in the vase, celosia is a very happy, colorful, and spectacular flower.
It’s a staple of flower farmers everywhere, working just as well into farmer’s market bouquets and mason jar arrangements as it does into high-end floral design and wedding work, and with as hardy and easy as it is to cultivate, no grower should be without it!
1. Selecting Your Variety
There are so many different types of celosia out there, you could have an entire farm devoted to celosia nd not get bored. With so many different colors, shapes and forms, there is a wonderful amount of diversity with all the breeding that has been done.
There are three varieties of celosia that you’ll need to be familiar with (they are actually different families), with slight differences in terms of form and growth habit between the three groups.
There’s the plume celosia (Celosia plumosa) that looks feathery - almost like amaranthus or a grasshead of some sort, such as Pampas Plume or the Sunday series that can be either be grown as one giant plume, or can be grown out to have multiple smaller stems with more diminutive plumes.
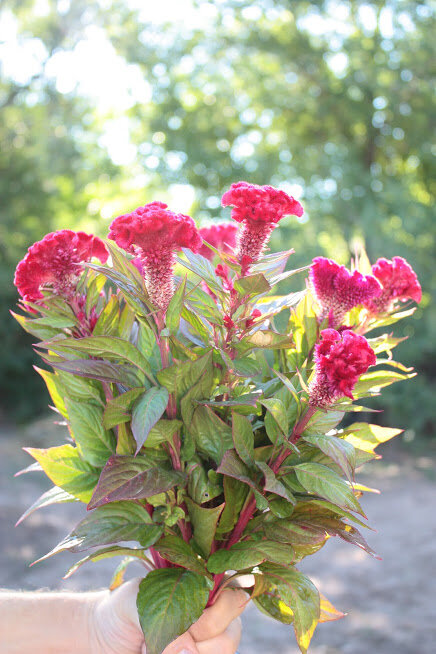
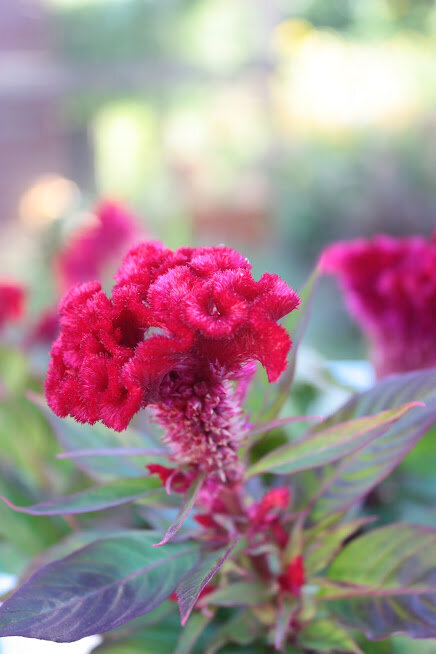
There’s the brain and fan celosias that have the funky, marine-life sort of looking heads that appear like brain coral or sea fans or chicken combs (thus their common name!) that are all of Celosia cristata. Some such as the Bombay series are only grown for a single plume or head, while others such as the Cramer’s series can be grown out to also bear multiple, smaller stems.
Lastly there are the wheat celosias (Celosia spicata) that are named for their numerous pointed flowers, similar in shape to veronicas or persicarias with many stems with multiple spike-form flowers born on each stem. There are some such as the Celway series that are a solid colored plume, while others such as Flamingo Feather are either a bi-colored or ombre coloration of their plumes.
All the varieties like the same conditions, with the only difference really being during harvesting, which we’ll get into later.
PLUME CELOSIA VARIETIES FOR CUTTING (Celosia plumosa) : Century, Cramer Hi-Z, Dragon’s Breath, Durian, Eternity, Forest Fire, Pampas Plume, Sunday, Sylphid
BRAIN/FAN VARIETIES FOR CUTTING (Celosia cristata) : Bombay, Chief, Cramer’s, Crystal Beauty, Delhi, Early Rose, Flame, Green Sango, Higyoku, Kurume, Neo, Spring Green F, Toreador, Yellow Queen
WHEAT VARIETIES FOR CUTTING (Celosia spicata) : Celway, Cramer’s Amazon, Flamingo Feather, Flamingo, Roseberry Parfait, Ruby Partfait
Make sure you don’t pick a dwarf variety - oftentimes these will be the varieties that are designated for bedding plants.
DWARF PLUME CELOSIA VARIETIES (Celosia plumosa) : Bright Sparks, Castle, Chinatown, Fresh Look, Gloria, Glorious, Ice Cream, New Look, Smart Look
DWARF BRAIN/FAN CELOSIA VARIETIES (Celosia cristata) : Armor, Cenobia, Concertina, Coral Garden, Dracula, Orient
DWARF WHEAT CELOSIA VARIETIES (Celosia spicata): Kosmo
2. How to Start Celosia from Seed
Celosia isn’t hard to start from seed - it germinates readily and quickly and you can start celosia either in cell trays or in soil blocks. - but there are two big things that you should be aware of.
First of all, celosia is definitely a warm season flower - it loves the heat, the more the better, and if your soil or weather is cool it won’t germinate well for you. If you live in a cloudy and cool, more northern area of the country that takes a while to heat up, you may want to consider starting celosia indoors to give it the heat it needs to start. The use of a heat mat will help your celosia to germinate quickly and uniformly.
If you are warm enough, you can direct sow celosia seed. Sow in a shallow 1/4” trench - we usually direct sow a few seeds about every six inches or so and thin out as they grow on. Celosia will pop up pretty quickly if kept moist and warm, and generally speaking we find that it outcompetes weeds pretty readily too, growing quickly to cover the soil with its foliage and mass.
Note that if you live in an environment that doesn’t get very hot and has a lot of cloudy days, you may want to consider growing them in a high tunnel or greenhouse to get enough heat to get them to grow more vigorously. I have some friends in the Pacific NW and northeastern part of the U.S. that have to do this (as opposed to us who get hot very early and quickly and gives celosia absolutely no problem when it comes to growing).
Celosia is also a very vigorous young seedling, and it will grow very quickly to fill its cell. You have to be careful with celosia because if left too long it will oftentimes start blooming in the tray when only a few inches tall, and there’s no saving it after that. Instead, try and get your celosia planted out in two to three weeks to ensure that it doesn’t get stuck in the seedling stage and has room and space to spread and grow!
3. cultivating celosia
Once you transplant out your celosia, it won’t take long for them to start growing - they grow very quickly in the heat and so long as you give them regular water and nutrients they will get big pretty quickly.
Generally, if you want to have a lot of smaller heads to harvest (to use in designs like centerpieces or bouquets) you’ll want to pinch your plants early on to encourage good side shoots. You want to do this when the plants are about six inches tall - simply pinch out the apex of the plant (where the plant is actually growing upwards) which will force the plant to then start generating side shoots instead.
Be careful of your variety when you do this. There are some celosia, such as the Bombay series that will absolutely not grow back if you pinch it. Even some varieties such as the Chief series may not really give you a good and full head if you pinch them, but definitely pinch all of the wheat celosia varieties for a very abundant harvest later on.
If your plants generally start getting taller than 24”, I would recommend looking into netting them so that they don’t lodge (fall over). This will help to ensure nice long and straight stems for using as a cut flower later on.
4. Harvesting Celosia
Celosia are generally pretty easy to harvest so long as you can determine if the flower is ready to harvest or not.
The flower of a celosia should be sturdy - it should not be floppy or wavy, and the stem should also be very firm and strong. And you shouldn’t wait too long to harvest them because they’ll start to set seed, and the little black seeds will start to form in the flower head (which in addition to ruining the look of the flower and putting you at risk of having seed drop might also potentially trigger some trypophobia)
Harvest in the early morning or late evening to ensure that you have the coolest temperatures possible. Strip the leaves off the lower stems and harvest into deep, cool water before using in your design.
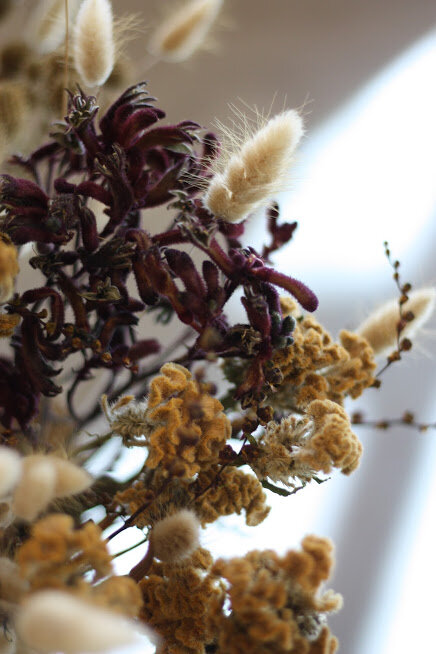
If you want to, you can also harvest celosia for use as a dried material as well. Harvest as you would normally, strip off the leaves from the stem and hang upside down to dry. Celosia makes for fabulous pops of color and texture in dried arrangements, giving arrangements a wonderfully exotic, textural presence.
5. Designing with Celosia
Celosia is a lot of fun to design with due to its bold colors and strong form. The large brain or fan celosia are excellent at making a big and bold statement in market bouquets, bridesmaids bouquets (for that bride who isn’t afraid of color!) and anywhere you need a splash of color (or a torrential downpour as it may be).
For large brain and fan shaped celosia, we generally will use them in accompaniment with another focal flower - such as a dahlia or a sunflower, either in complimentary or contrasting colors. Sometimes we’ll even use them on their own, paired with other bold materials like dark opal basil and zinnias to create a very fun arrangement.
Some of the celosias lend themselves well to more muted tones too. The light-pink colored ‘Flamingo Feather’, ‘Ruby Parfait’, ‘Cramer Hi-Z’ and certain shades of the ‘Supercrest Mix’ and ‘Pampas Plume’ and ‘Celway’ varieties incorporate well with blushes, peaches and pinks, while the pale yellow ‘Sylphid’ and ‘Spring Green’ are much more amenable to the softer, pastel colors.
The wheat plume/spicata varieties are a great source of texture and movement in arrangements. My main complaint is that they are very upright and very bold as far as their form, so it is helpful to pair them with something softer and more voluminous to make the vertical line of their stem be a little less harsh.
When dried, celosia will hold its color very nicely if you keep it out of sun (which will bleach it), providing beautiful pops of color for fall and winter wreaths and arrangements. You can of course also allow it to go to seed and then let it freeze and bleach in the winter sun, which turns it a lovely straw-white color that is great for more muted color palettes as well.
I hope I’ve encouraged you to try growing celosia
Believe me, you won’t regret planting this bold and colorful plant as a cut flower. Whether you’re cutting it for bouquets, selling it at your farmer’s market or florist customers, or even just growing it in the garden it will be a phenomenal plant for you.
If you’re interested in growing other cut flowers that love the hot weather of summer, check out these other growing guides:
How to Grow Castor Bean (Ricinus) in the Garden and for Floral Design
The Glory of Zinnia Haageana (Aztec, Jazzy and Other Small Zinnias)
And if you’re interested in growing cut flowers as a business - whether that’s selling at a roadside stand, a CSA, at a farmer’s market, to florists or for your own design work, check out our eBook bundle for flower farmers!


