Soil Blocking for the Flower Farmer
If you’ve been doing any sort of large scale farming for a while (vegetable or flower) you’ve probably heard of growing in soil blocks and soil blocking.
Soil blocks are what they sound like - compressed cubes of soil or potting mix that are used to grow plants in. Unlike the more traditional way of planting seeds directly into cells or pots, seeds are directly sown into these blocks of soil and are used by many farmers and gardeners to start seeds every year.
A bit of history on soil blocking
The OG soil blocking guru was Eliot Coleman - one of the big names in intensive vegetable farming. He saw soil blocks being used in 1976 in Europe and really liked the efficiency (to allow him to place more seed starts on heat mats) as well as the health of the seedlings in soil blocks and ease of transplanting (roots immediately started to grow into the surrounding soil). And after Eliot Coleman designed and introduced the soil blocker to the American market, it started taking off especially with vegetable farmers.
what is soil blocking?
Soil blocks work similarly to those peat pellets - but in my opinion, work way better. Unlike the peat pellets that seem to really be very stodgy and lopsided, soil blocks are great for starting seeds.
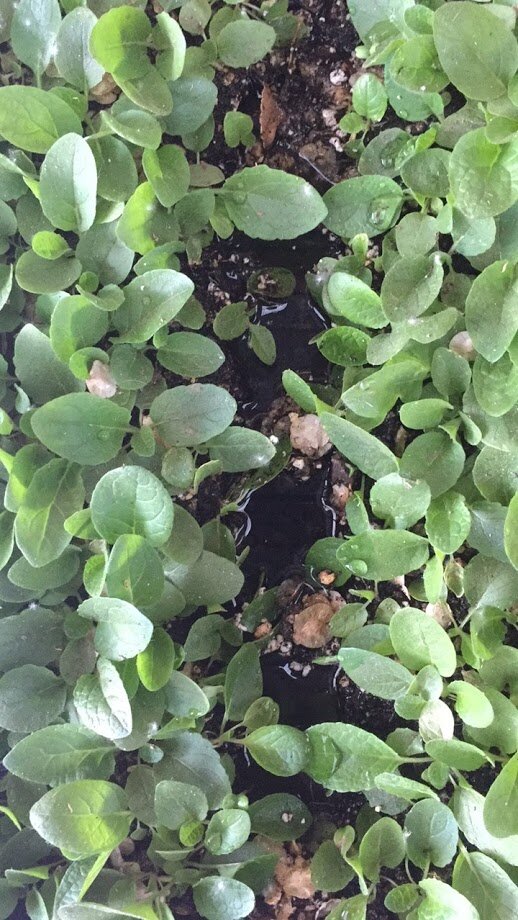
Each soil block is a single, stand-alone compressed block of soil that uses the compression process to cause the material of the soil to stick together. Indeed, they are so solid that even after they dry out, they still can be picked up as a solid cube.
The soil block is meant to support the growth of the seed - once the seed germinates and starts growing, it will start pushing its roots down into the soil of the cube and start growing from there. When in this cube of soil, the root system develops very quickly and readily due to a phenomenon known as air pruning.
Air pruning is where the developing root system hits the exterior of the soil. Knowing that it can’t advance any further (the roots would advance into the open air), the root system then creates secondary roots that branch out from the first root and start spreading out until they also hit the air, and this continues until the root system has formed this wonderful, beautiful well-branched system of roots in the soil block.
Even better is the fact that these roots transplant really well. When grown in an enclosed container like a cell tray or a pot, roots will start to circle instead of branch. And like anything else, it takes time and energy for the plant to stop its roots from growing in circles to growing outwards into the surrounding soil. Soil blocks help with this because the roots immediately start growing outwards into the surrounding soil - because of the air pruning that we talked above, the roots are already headed in the right direction.
The soil blocking tools are these metal contraptions with a spring-loaded handle that takes seed starting mix and compresses them into these little cubes of soil. Each cube has a little divot on top that the seeds can be placed into.
There are several sizes of soil blocks - anywhere from the original 1.5 inch blocks to the 3/4 inch blocks that are the ones most commonly used. The larger blocks I use for larger seeds like sunflowers, sweet peas, squash, castor beans and beans while the smaller blocks I use for everything else.
Advantages of Soil Blocks
There are quite a few advantages to soil blocks, which explains their popularity especially around farmers.
REDUCES PLASTIC WASTE
For those of us who grow large amounts of plants, there is inevitably the large amount of plastic waste that is generated from pots, flats, trays and domes. Although you still need to have some sort of plastic tray or sheet in order to grow seedlings in soil blocks, you can at least cut out the cell tray or pot part which helps to reduce the amount of plastic needed.
SPACE EFFICIENCY
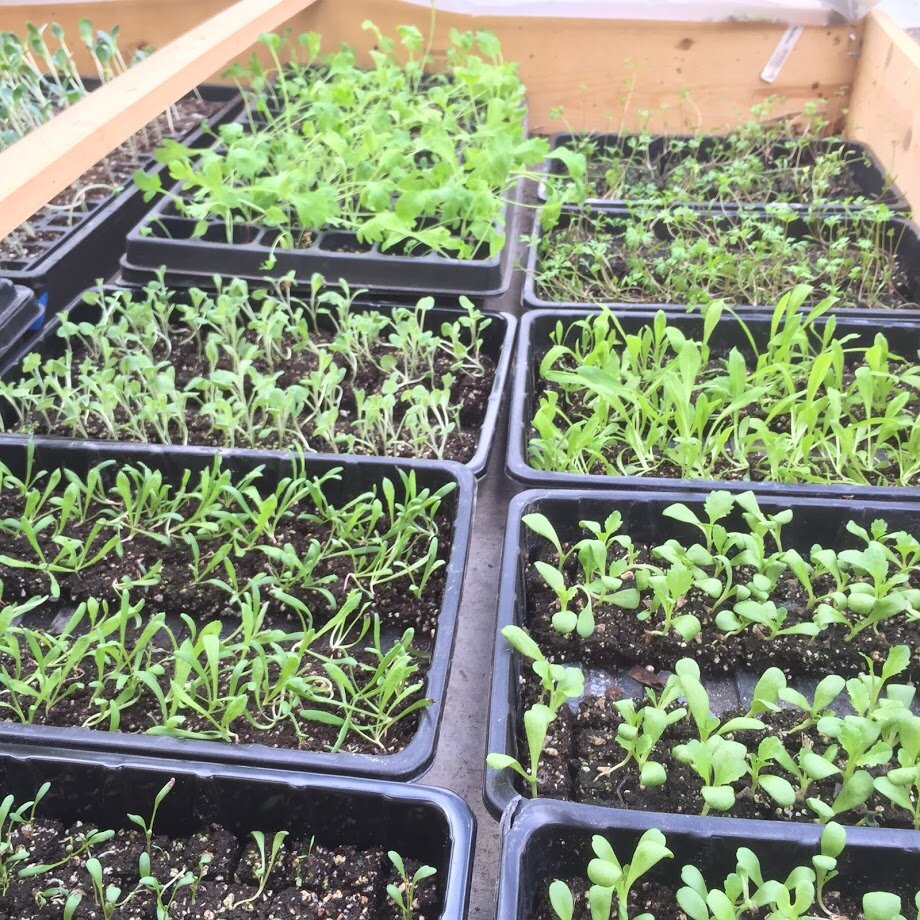
This is a huge one for farmers in that you can fit a lot of soil blocks in a very small amount of space, which means you can start a lot of plants in a very small amount of space too. A little 11 x 21 seed starting tray can hold around 200 soil blocks, which means 200 little seedlings in a very small space. And you can fit a lot of those 11 x 21 seed starting trays in a very small area - it’s intensive seed starting at its finest, and you can grow an entire flower farm or garden in a very small area!
QUICKER GROWTH
I’m not sure exactly what it is about seedlings in soil blocks that grow quicker than in cell trays. I think it has something to do with the way the roots grow - since the roots split outwards and are quickly air pruned, the seedlings tend to be more vigorous as their root systems develop much more quickly. I find that the soil block seedlings grow much more quickly than their cell-tray grown counterparts, which makes for less time under lights and more time in the ground!
EXCELLENT ROOT HEALTH
As I mentioned above, soil blocks are great for conducting good root health. The natural air pruning that happens because of the exposed surface area of the soil block makes for a very healthy and well branched root system for your seedling. Nice, healthy, white roots will form a thick network of roots in the soil block will ensure a healthy young plant ready to be transplanted out.
EASY TO TRANSPLANT
Seedlings grown in soil blocks are far easier than cell trays to transplant- mostly for the fact that they are already out of the cells! Instead of sitting there with a chopstick and painstakingly pushing out the cells, you just pull off each soil block and your transplant is ready to go into the ground. And unlike when growing in cell trays where you have to worry about weak roots that break easily, soil block seedlings have very sturdy root systems that are easily manipulated - I think personally that the way the roots are air pruned help to make them much more sturdy.
NO GREENHOUSE NEEDED
While larger growers will always need a greenhouse or hoophouse of some sort to start seedlings, smaller growers can get away with having soil blocks on racks in their basements, garages, sheds and offices. It’s surprising just how many seedlings can be produce via soil blocks in a very small amount of space - thousands literally, and many a flower farm has succeeded using soil blocks to their advantage.
Disadvantages of Soil Blocks
Although soil blocks are excellent and they are what many flower farmers utilize for growing their crops, they aren’t without their disadvantages.
MAKING SOIL BLOCKS TAKES TIME AND EFFORT
While I can simply fill a cell tray with potting mix in a few seconds, making soil blocks takes more time and effort. Although I can make a tray of soil blocks in about five minutes, it still takes considerably more time to make soil blocks - and also takes more work and can make your hands hurt after the first couple hundred blocks!
SOIL BLOCKS ARE VERY TECHNIQUE SENSITIVE
Although we have soil block making down to a science now - using Promix, getting to the correct consistency, using the correct container - it took us a long time to get to this point after a lot of trial and error. And if any factor is off, it can effect the success of your soil blocks.
For instance, if you don’t pack your soil blocks carefully, they can fall apart and if you don’t get your soil mix right, it can either stick to the soil blocker and not come out cleanly or it can just fall right out of the blocker and not make it to the tray. Making perfect soil blocks - quickly and consistently - takes a lot of practice, so be prepared for a lot of your first trays of soil blocks to be less than perfect!
DIFFICULT TO START CERTAIN SEEDS
Certain seeds can be difficult to start in soil blocks. For instance, large seeds like sunflowers, zinnias, ricinus, hyacinth runner beans and love in a puff can be hard to start in mini soil blocks because they are so large - and the resulting vigorous root can actually push the seed out of the soil block and off onto the floor of the tray!
Vigorously growing seeds can also be problematic as well, because given the propensity of seedlings to grow quickly and thoroughly in the soil blocks they can start outgrowing their soil blocks quickly. We find that especially in the summer, a lot of seedlings start wilting easily despite twice daily waterings - a sure sign that they are starting to get root bound and won’t perform as well once planted out.
NOT GREAT FOR GROWING LONG TERM
I think that soil blocks work great for seedlings that grow for a short period of time - approximately 6 weeks or so. Although soil blocks are pretty sturdy, they still start to deteriorate after a period of time with repeated watering again and again, and they’ll start to look a bit less square around the edges and start collecting algae over time.
Personally I find that it’s best to plant seeds that need a long time to grow - perennials like rudbeckia, echinacea, ornamental grasses, even biennials like lisianthus, digitalis and aquilegia - do best in cell trays or pots because the containers help hold the seedlings intact for long periods of time - months to even years as needed and are much easier to handle and keep watered.
NO OVERHEAD WATERING
While most other seed starting setups are easily watered from overhead, soil blocks cannot be overhead watered. They’ll break apart, your seeds or seedlings will be washed away and that will be the end of that. Instead you’ll have to water them carefully with a very low pressure stream of water. This works OK if you have just a few trays, but it gets maddeningly inefficient if you have to water more than six trays in my opinion.
They also cannot sit outside either - any rain will give you the same end result. The few times that we’ve gotten torrential rain and there has been a tray sitting too close to a downpour has led to drowned seedlings floating in a big pan of water and a very unhappy flower farmer! This will require them sitting under some sort of overhang or shed at least during the times of year when you can get rain.
DIFFICULT TO HARDEN OFF
Although it seems that soil block seedlings are easy and great to grow, they are difficult to harden off. Because they are in the trays, difficult to overhead water and have a relatively small soil mass, they are very prone to drying out quickly and wilting. It doesn’t take much to kill off soil block seedlings either - despite their great root systems, the mini soil blocks in particular dry out very quickly. And out in the sun and exposed to wind? It can be difficult to walk the line between hardening off your seedlings and killing your seedlings.
SOIL BLOCKS ARE FRAGILE
Soil blocks are not quite as sturdy as cell trays. I’ve had many seedlings in cell trays that have been dropped, kicked, stepped on, and they do just fine. Soil blocks on the other hand? You’re screwed.
Soil blocks depend on that cube of soil staying intact. if they don’t - that ruins the seedling. It doesn’t matter if you drop the tray, a dog decides to run through your soil blocks, or the wind flips your trays over - those seedlings will have a very difficult time coming back from that.
As I mentioned previously, weather and erroneous watering will ruin blocks too. And long term, they don’t hold up really well either without some protection.
So What Do We Start in Soil Blocks?
The majority of plants we start in soil blocks are grown in the winter and early spring - this is because temperatures are cool enough to where seedlings won’t be getting leggy or growing too quickly as a result, and they do better grown in soil blocks indoors as opposed to growing outside (seedlings grown during the warmer seasons do great outside).
The majority of these are hardy annuals and biennials as well as some perennials thrown in there for good measure. Many of these are best planted in the springtime to ensure that they get a nice long cool establishment period before the weather starts getting warmer, and starting them in soil blocks helps us to grow a lot in a very small area. No greenhouse or hoophouse needed either - these can be grown inside an unheated garage or barn under lights, and then moved out into a sheltered area once they are hardened off.
The types of plants we start in soil blocks include:
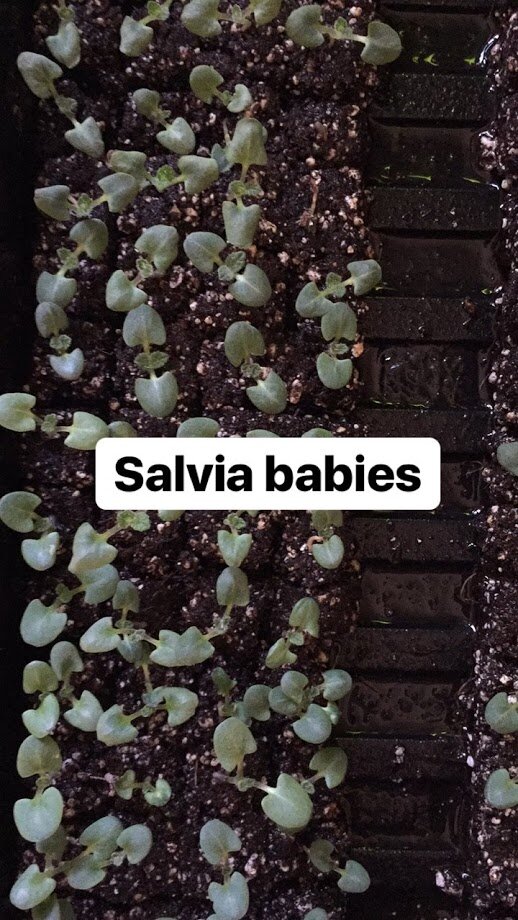
Salvia (clary sage, culinary sage, blue bedder sage)
Verbascums/Mulleins
Poppies (Icelandic, Shirley and Corn)
Achillea/Yarrow
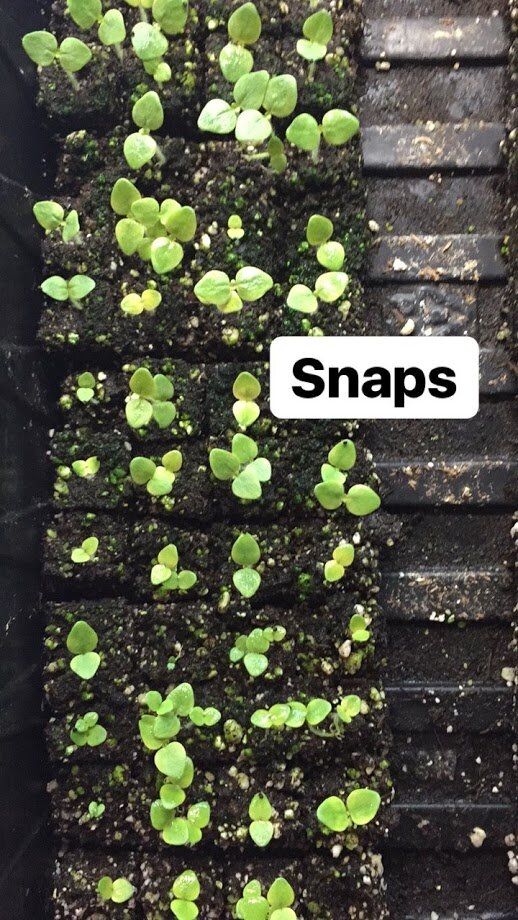
Snapdragons
Digitalis/Foxgloves
Bells of Ireland
Bupleurum
Larkspur
Nigella
Dianthus
Carnations (Chabaud series)
Chinese forget-me-nots (Cynoglossum amabile)
Violas and pansies
Echinacea (to be potted up later)
Basil
Dill
Scabiosa atropurpurea (large soil blocks)
Sweet peas (large soil blocks)
For the most part, we don’t start anything that is very vigorous and large and quick growing or plants that take a very long time to grow. Generally speaking most tender annuals and true perennials we start in cell trays - it’s far easier to keep up with watering them during the heat of summer and early fall since the cell trays hold more moisture due to their greater volume and are easier to start seeds like zinnias, sunflowers, amaranthus, marigolds, ornamental grasses, lupines and delphinium in.
Our Soil Blocking Method
There are many ways of soil blocking, each of which have their own proponents. We’ve found a way that works for us, so feel free to modify this as you see fit!
Equipment you need:
Soil blocker (mini 3/4” or regular 1.5”)
Potting mix (we prefer Promix HP)
Scoop for potting mix
Large plastic dish tub or similarly wide and sturdy container
Water
Tray - I prefer the 1020 and the 1010 seed starting trays since they have grooves to create air spaces on the bottom to promote good root health. Some people like cafeteria trays, some people like aluminum foil pans, but I like the fact that the 1020’s and 1010’s work so well.
1. Place your potting mix into your dish tub with the scoop. I usually fill the tub about halfway to make room for mixing and saturating the potting mix.
2. Wet your potting mix until it is evenly moistened and saturated with water. It should be very wet and clumpy, not quite to the point of being muddy or liquidy, but it should stick together nicely. If too dry, your mix will stick to the soil blocker and not come out cleanly. If too wet, your mix will fall out of the soil blocker.
3. Take your soil blocker and press it down into the potting mix. Squish it all the way to the base of the dish tub, then wiggle it back and forth to squish off excess potting mix. I usually will then pack in even more dirt by pressing it down into the potting mix again - the idea is to make a very dense cube of soil in each cell by pressing it down against the bottom of the dish tub.
4. Pull your soil blocker up. The soil should stay within the cells and not be falling out. If it’s falling out - you haven’t packed it well enough. Pack it down into the potting mix again and really squish it into there.
5. Once your potting mix is staying within your soil blocker, transfer it over to your tray. Position the soil blocker about 1/2” away from the edges of the tray and then push on the handle up top to release the soil blocks. I prefer to rest the entire contraption onto the bottom of the tray, press on the handle, and then gently pull away the soil blocker - this way it allows the blocks to be resting before you eject them, instead of letting them fall from a height which could cause them to break or fall over.
6. Once you have your soil blocks created and your tray is filled, plant your seeds. For larger seeds, poke the seed into the middle depression of each soil block. For smaller seeds, either sprinkle on top of the soil blocks or use a toothpick to individual place a seed on top of each soil block.
7. Cover your trays with humidity domes and place in a warm area. If you don’t cover your trays with humidity domes, you may want to think about sprinkling the top with vermiculite to hold moisture in.
8. Keep your soil blocks well watered until your seeds start sprouting. You want them to be evenly moist - not watery, not dry, just moist enough. Always ensure that you bottom water by filling the bottom of the trays with a small amount of water - enough to moisten the blocks evenly but not enough to have standing water. Any standing water at the end you should suction out using a pipette or ladle.
9. Once your seeds start sprouting, place them under lights to grow out. I keep the humidity dome on until the seedlings start pressing up against the dome usually - I find this helps them to develop well enough to where I can remove the lid without much issue so long as I give them a good bottom watering.
10. Fertilize your seedlings as they grow by adding a dilute fish emulsion as you’re watering the soil blocks. You can also use a kelp fertilizer too - both will give young seedlings the nutrition they need to develop normally.
11. To harden off your seedlings, expose them to the outdoors gradually. Give them a couple hours in a bright, cool place initially, then bump them up to increasingly brighter and more exposed conditions until they’re ready to go out into the ground.
A final thought on soil blocks
Technically nobody can tell you if soil blocks are right for you and your operation.
Maybe you’re a micro urban flower farm that doesn’t have space for a greenhouse, but you need to produce a lot of seedlings? In that case soil blocks would offer you a lot of advantages for your situation.
On the other hand, maybe you’re a 4 acre flower farm with a dedicated greenhouse and you need to plant thousands and thousands of zinnias. Perhaps soil blocking makes less sense for you given the increased amount of work for seeds that are better started direct sown.
You have to weigh the pros and cons to see if it will be advantageous for you. I know for us soil blocking works great during the winter and early spring, but as soon as April hits I usually end up abandoning soil blocks for cell trays due to the heat and acceleration of growth. You just have to try it and see what works best for you!
What are your thoughts on soil blocking? Have you used soil blocks before? And if so, what did you think?
Also, I did a podcast on our experience with soil blocking. Check it out below!