Three Items to Help You Stay on Schedule as a Flower Farmer
During this time of year, we’re just starting on our season of growing. Ranunculus and anemones have been started, hardy annuals have been seeded, beds have been prepped and away we go.
But, there’s a lot of preparation that comes prior to this moment. A lot of sitting and planning and calculations and research is completed prior to us planting a single seed or ordering a single corm.
Over the years, we’ve tried many different ways of tracking and keeping track of ourselves during the growing season. Some more complicated, some simpler, and through it all we’ve streamlined the way in which we plan and track and stay on task with our season.
Flower farming can get complicated very very quickly, and it’s easy to let the season get away from you. To stay on track, for us it boils down to three items - the vision board, the map (or design) and the spreadsheet. Each of these items support each other, help to understand your planting schedule and scheme and will help you to stay on schedule as a result.
Let’s take a look at each of the three items in detail:
The Vision Board

So, a vision board is all about creating. This is where it all starts.
I like a vision board because it helps to keep the end goal together. Too many times I’ve dreamed up an amazing palette, only to lose sight of it because it wasn’t visually present.
I’ll usually end up creating two boards - one for spring and one for summer/fall. Due to the fact that there’s a pretty big turnover as far as what blooms in the spring and what blooms in summer/fall, it’s important for us to have two vision boards. You may actually want to make a third board for the fall if your material line-up changes drastically - I know some growers that really concentrate on having new fall colors like burgundies and rust-colored materials.
What I love about vision boards as well is that you’re able to see all your flowers all together at one time in the same place. It allows me to see them assembled together and I can check and see how it all looks together and inspect the lineup. Do all the colors go together? What’s the overall tone of the flowers? Do I need more filler or more focal flowers? Do they make sense together as well?
For instance, when I was creating this vision board for spring I had originally wanted to plant Wiltshire Ripple sweet peas and Dark Knight scabiosa for some burgundy punches to contrast with the lighter, pastel colors. However upon seeing them included in the vision board, I decided that it would be better to leave them out and keep the spring color palette a lot lighter.
You can use whatever you would like to create it. A physical board is the OG version of course where you actually cut out photos and tape (or glue or staple) them together to create a visual montage - but it may be more preferable to create a virtual vision board.
Pinterest of course is an easy way to put together a virtual vision board. By simply adding pins of flowers that you want to add, you can start to get a better feel and vision for your flower lineup.
I personally like having a composite image of all the materials together so I can refer to it in the future, so I’ll use a program like Canva to create one single image of the board. This will become the capstone of the flower farm for the upcoming year.
The Map (or Design)
I like to call this the map because it sounds more pertinent to what we’re trying to do - orient ourselves and navigate our way through the season. But you can of course call it whatever you would like!
You’ll want to start off by getting the dimensions of your property that you’re growing on. Generally speaking you’ll likely already know how big your growing area is - but if you don’t, you’ll want to take some measurements. Smaller growing areas can be measured by hand, larger growing areas you may want to get a survey done.
Secondly, you’ll want to decide on your rows or grids that you’ll be growing in so you can calculate the amount of bed space that you have available (minus pathways and other non-planted areas). We grow in 36” wide beds with 12” paths in between the beds, so this helps us to setup our rows and know how much actual room that we are working with for planting.
I will calculate out how many plugs or tubers or bulbs we need based on the recommended spacing for each species or cultivar. For example, dahlias are planted at 12” while larkspur and zinnias are planted at 9”.
For example, if I was calculating out how many zinnias to plant in a 36” x 20’ row:
36” wide beds means you can have 4 lines of zinnias (at 9” spacing)
20’ means at 9” spacing you could place 26 zinnias in one line (26.666667 zinnias to be exact, but you can’t plant 2/3 of a zinnia, so…)
26 zinnias per line, 4 lines total in a row = 106 zinnias in a 36” x 20’ row
I’ll then draw out the rest of the beds - for spring, summer and fall - so that I have an idea of where everything is going to go. I can of course make changes as needed - if sunflowers will block out the light to your zinnias or the dahlias are going to crowd out your basil.
Your drawings don’t have to necessarily be anything fancy or complicated either. I’ve seen everything from giant whiteboards to computer programs specifically meant for planning - all of which can be useful. But you don’t need to make things super complicated - in fact, I usually just scribble mine down on a piece of notebook paper - both because it helps me to be able to quickly and readily recall the design as well as any changes (even major changes) can be made easily. Whatever works best for you is of course the one you should use.
By drawing everything out, I can see where everything is going to be planted, how the beds will change over the seasons, and most importantly how much of each material is going to be planted. This is a great visual cue to again check and make sure that you have the correct amount or proportions of each material throughout the season.
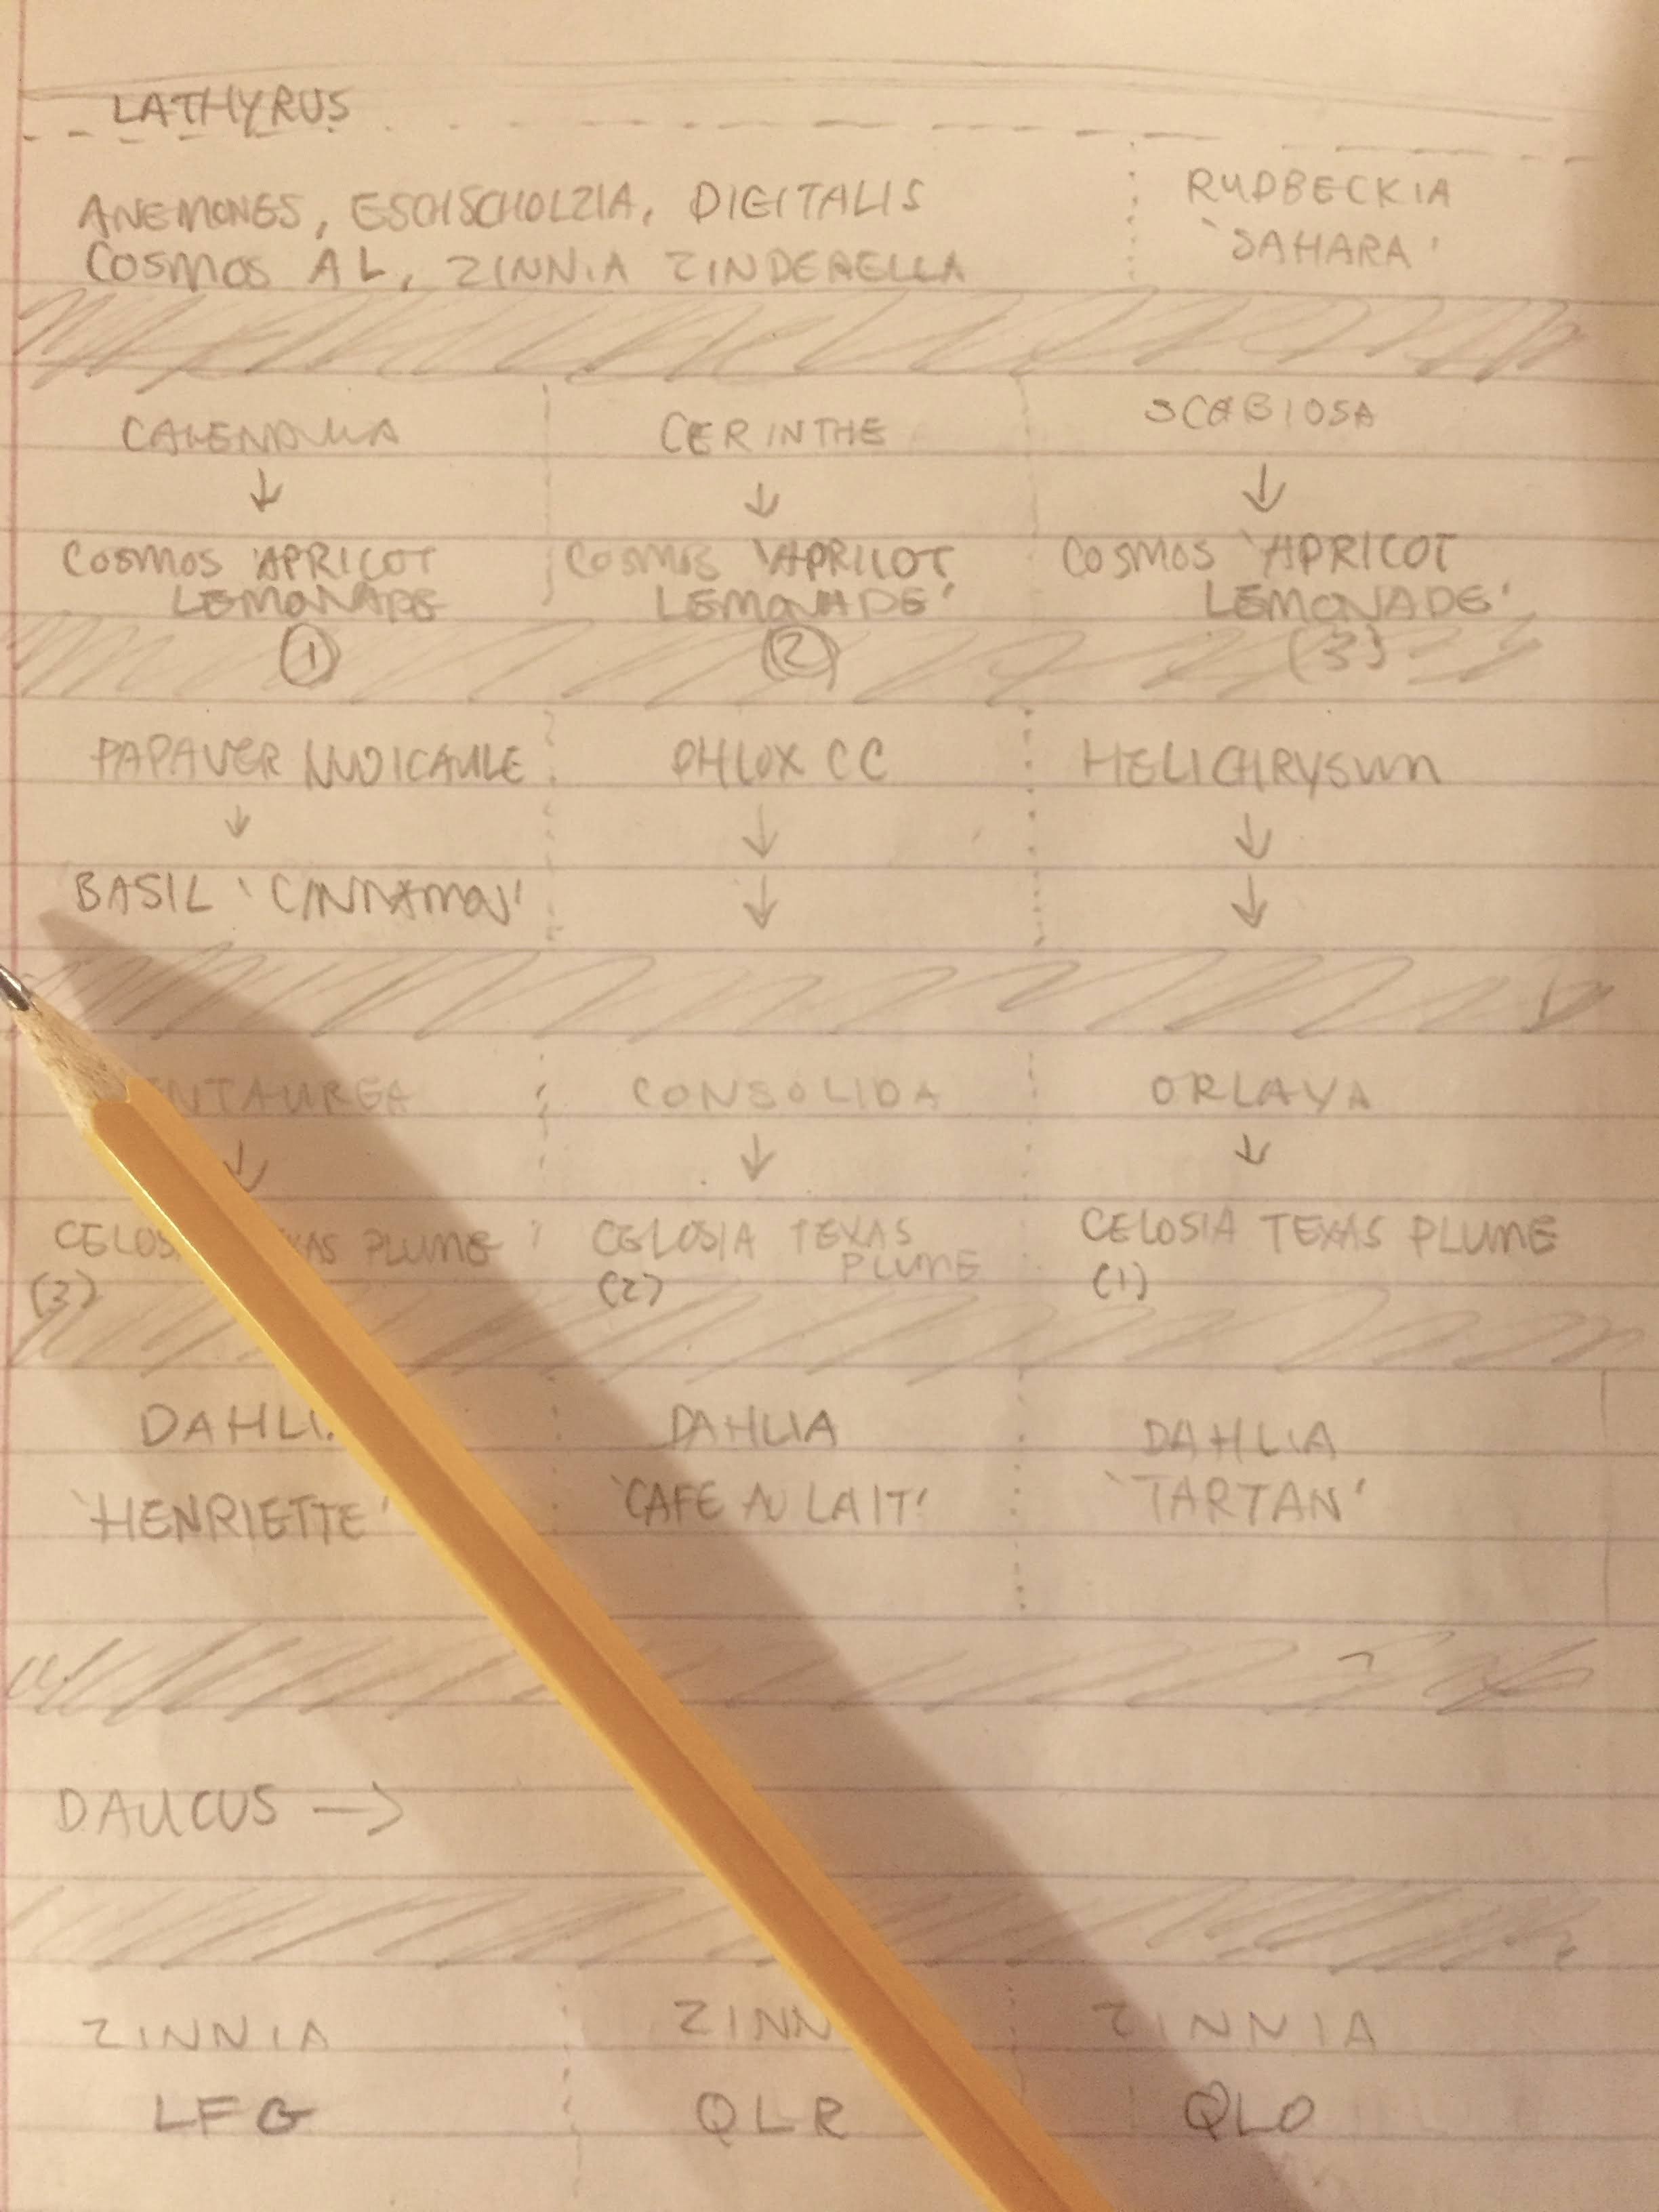
The Spreadsheet

Now that we have a vision in mind and where everything is going to go, the spreadsheet is the way we make that vision into reality.
This is where all of those details - spacing, germination dates, days to maturity - are stored. Any and all research you do goes into this spreadsheet.
I like the spreadsheet because it’s also a vision board - but one that works in numbers and dates as opposed to images and colors. It’s a way of communicating the vision - all the way from starting seeds and tubers all the way through harvesting.
The same way that other professions have their own inside lingo and ways of communicating, a spreadsheet technically can be a way a well that flower farmers can communicate with each other as far as what they’re working with.
From the spreadsheet, I can tell how big of a scale a flower farmer is working on, everything that they’re growing, how their materials will change throughout the season, and even have a general idea of their month by month planting, harvest, and prep schedule.
And when you’ve been doing this long enough, you’ll be able to start seeing problems or holes in the spreadsheet. Problems like not having enough spring filler. Or not having a space to plant a fall crop of sunflowers.
That’s why it’s so important to plan things out - you can identify and rectify issues problems before the season has even begun. When you’ve planned well ahead of time you can ensure you have enough seeds, bulbs and tubers ordered early on, expand your growing area as needed, or even scrap the whole thing and restart if needed.
I make all of mine in Google Sheets - the free version of Excel - but you can also use Excel if you’d like to. Or you can even write it out by hand if you like doing the calculations yourself, but I find amending a digital spreadsheet much easier.
For my headings, I’ll put the following:
Location (I have all of our beds numbered and broken up by section)
Cultivar/Variety (Especially important when you have a ton of cultivars for something like dahlias)
Spacing (6”, 9”, 12” are the usual ones)
Quantity (of seedlings, seeds, bulbs or tubers)
Date to start seeds (or cuttings or tubers)
Date to plant out
Days to maturity
Date of first bloom/maturity (estimated)
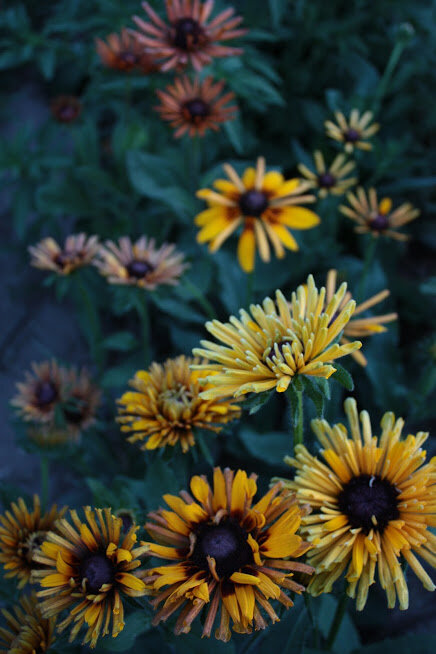
You can of course add other bits of data and notes as needed. For example, I made a mistake this past year of not covering my Rudbeckia ‘Sahara’ seedlings and as a result most of the seedlings dried out, so I made a note in the cell to re-sow them (at which point I can re-enter the dates to correct them).
If you would like a copy of the Google Sheet template that I use, you can access it below and modify it to fit your needs
Google Sheet Kokoro Garden Planting Schedule Spreadsheet
It is important to note that although I spend a lot of time putting work into the spreadsheet, I am usually tossing out the spreadsheet by May comes speeding along. Partially because I don’t need to follow it (I’ve memorized the layout by that time) and partially because when the season is going at breakneck speed, the spreadsheet tends to also have so many changes to it by this point that it’s no longer accurate.
Which is totally okay, because at this point I’ve already planted spring crops and seeded summer crops, and there isn’t actually too much to prepare for that requires a spreadsheet at that point. We’re moving into phase 2 - harvesting, weeding, watering and sales (vs. phase 1 which is planning, organizing and seed starting).
Still, if you’re a spreadsheet person, you should definitely make one - and just update it as you go!
Kokoro Garden Planting Schedule Spreadsheet
(Modify as needed)
I Hope This Helps You With Your Planning!
Whether you’re a major planner or if you like to fly by the seat of your pants (or if you like to do a bit of both) I hope that showing how we use vision boards, maps and spreadsheets helps you in your flower farming efforts.
Even if you don’t stick to these 100% (because as we’ve learned, nature always has a way of changing your most carefully made plans - never fully understood that saying until we started growing flowers!) these tools should be able to help you envision your future farm, stay more organized, and be more successful and less stressed out.

From soil to seed starting to planning - you can read everything here