How to Start a Beautiful Cut Flower Garden II: Spring Flowers: Hardy Annuals and Biennials
It’s hard to believe that in just a few short weeks, we’ll be starting to see the first blooms of the season here. Starting off with the winter jasmine and iris reticulata, spring is probably one of our favorite times of the year with some of our all-time favorite flowers blooming (muscari, narcissus, lilacs, ranunculus and anemones to name a few!)
It’s also exciting because with the arrival of the new year it is OFFICIALLY time to start seeds for our 2020 gardens. While we did plant some things in fall and will overwinter plenty of perennials, we start a lot of seeds in the winter for planting out in early spring.
In particular, the cut flowers for spring are absolutely wonderful with all their ruffled petals and tall spires and pale colors being such a refreshing sight and experience after a long and cold winter. And one of the things getting me through this winter is the sight of little baby seeds starting to wake up along with the anticipation of them growing into big, full, plants laden with blooms in just a few short months.
Although we’ve talked plenty in the past about the flowers that bloom from bulbs and corms (tulips, daffodils, anemones and ranunculus etc.) the extremely beautiful and productive hardy annuals and biennials are just as important to us in the spring. From a packet full of seeds you can grow a beautiful garden full of flowers to cut, enjoy in the garden, or offer pollinators a much-needed source of nectar in the spring.
The Benefits of Fall Planting Hardy Annuals
The Problems with Fall Planting
Other Factors for Overwintering

Join the Kokoro Garden group on Facebook!
A group for flower lovers, gardeners and growers to learn and grow together
What are hardy annuals and biennials?
Good question!
Hardy annuals and biennials are plants that are grown from seed that only last one season (possibly two at the most in the case of biennials) and that season is in the spring. They will sprout, grow, and then bloom until the weather gets too hot for them to continue to grow, at which point they will go to seed and die, their life cycle completed.
For most of us, hardy annuals and biennials will only last us through the spring and possibly the early summer until it gets too hot, after which they are replaced with summer-blooming tender annuals and perennials.
Some examples of hardy annuals include:
Cornflowers/Bachelor buttons (Centaurea cyanus)
Icelandic poppies (Papaver nudicaule)
Corn and Shirley poppies (Papaver rhoeas)
Corn cockle (Agrostemma githago)
Annual scabiosa/Pincushion flower (Scabiosa atropurpurea)
Clary sage (Salvia viridis/Salvia horminum)
Wallflowers (Erysimum bicolor)
Violas and pansies (Viola cornuta/Viola bicolor)
Queen Anne’s Lace (Daucus carota)
Ammi majus (False Queen Anne’s Lace)/Ammi visnaga (Green Mist)
Hare’s Ear (Bupleurum rotundifolium)
Bells of Ireland (Molluccella laevis)
Cerinthe (Cerinthe major)
Snapdragons (Antirrhinum spp.)
Larkspur (Consolida delphinium)
Some examples of hardy biennials (requiring a fall planting and overwintering) include:
Moneyplant (Lunaria biennis)
Sweet rocket/Dame’s rocket (Hesperis matronalis)
Foxgloves (Digitalis spp.)
Mullein/Verbascum (Verbascum spp.)
Hollyhocks (Alcea rosea)
Some varieties of dianthus (Dianthus barbatus)
You can see there are a lot of very familiar and iconic flowers amongst the hardy annuals and biennials - many of them being big favorites of spring blooms.
But growing hardy annuals and biennials can be a bit trickier than planting bulbs or corms. Take for example daffodils - you can just plant them into the landscape and then walk away. So easy, no major maintenance or care is needed at all, you just drop it into the hole and let Mother Nature take care of the rest of it.
Starting hardy annuals and biennials is a bit different. There is a bit more work involved when you are starting seeds and growing them out of course, but the MAIN work when it comes to hardy annuals and biennials is finding the correct time to start them and then plant them out.
I’ll repeat that again: TIMING is the most important part of succeeding with hardy annuals and biennials.
And this can be tricky. It took me a while to understand it, but I have finally learned through trial and error the best time to plant these special flowers.
In a nutshell, the best time to plant hardy annuals and biennials are in order of rank:
In the fall to overwinter
In the early spring
In mid spring
The earlier you can plant out your hardy annuals and biennials, the more time it has to grow roots. Similar to how a hardy perennial left to grow in the ground will get bigger and bigger over several season, hardy annuals and biennials will get bigger and healthier the root systems the longer they can stay in the ground.
Ideally this is in fall, but you can also do early spring (Feb-March) or in mid spring (April-May) depending on your climate (more on that later).
To sum it up
Planting in fall = biggest, most productive plant
Planting in early spring = smaller, still pretty productive plant
Planting in mid spring = smallest, less productive plant
(Of course there are a lot of factors including your growing zone, how you start your seeds, which varieties you grow, if you use protection or covering for growing your flowers, your humidity, your hours of daylight, the weather you receive in spring, the precipitation you receive in spring and so on. We’ll get into all of that later).
Let’s talk a bit more about more of the advantages of fall planting first!
The Benefits of Fall Planting Hardy Annuals
With a lot of flower farmers, fall planting is toted as the end-all-be-all for spring planting.
The main reason is that with a long cool/cold establishment period for growing, the plants are allowed to grow a very large root system. Large root systems support healthy and large plants, which in turn produce long stems, big flowers and lots of them.
One of the main reasons why many people fail with spring-blooming flowers is that they are started (and planted out) too late. Many people wait until their last frost date to plant out (or even start) spring-blooming flowers which is far too late in the season to get the optimal quality and size of flowers.
Take for example us in Zone 7b. We have our last frost date on April 15th (give or take). But by the end of May, we’re over 90 F with full sun - temperatures that are not conducive to spring blooming flowers. Ranunculus for instance, stop producing flowers at 80 F and start going dormant at that temperature as well.
That means there’s only around 45 days of frost-free weather before the spring ends very quickly and we head straight into summer - hardly enough time to grow most of the spring flowers effectively.
If you’re able to start those spring flowers earlier and give them a longer growing period, you’ll get healthier, more established plants that produce more flowers and blooms and are much more productive.
That’s why fall planting is important. If you can get your flowers planted in the fall and let them overwinter they will have around six months of establishment in nice cool weather, allowing them to grow large root systems that will then produce great flowers in the spring. The fact the ground is still warm in fall and the weather mild enough to allow for the initial growth and establishment of the seedlings makes fall the perfect time to plant.
Sounds great, right?
Except that it’s not quite that simple.
The problems with fall planting

As it turns out, fall planting requires getting a lot of specifics correctly:
Living in the correct growing zone (with the exception of perennial/biennial plants - more on that in a little bit)
Selecting the correct species that will overwinter in your zone
Having the perfect amount of moisture - not too dry, not too wet
Having relatively mild amounts of precipitation or alternatively extremely heavy snowpack (I’ll explain this again in a little bit as well)

As it turns out, there are only three hardy annuals or biennials that are classed as reliably surviving an average Zone 6a winter (which can get down to below -5) which are Icelandic poppies, dianthus and orlaya. Great flowers, and extremely useful, but only three varieties that are guaranteed to survive that temperature range.
I remember living in a Zone 5a - not even violas and pansies survive the winter due to the extreme cold, and even sometimes true perennials such as purple coneflowers (Echinacea purpurea) or black eyed susans (Rudbeckia hirta) may not survive.
Here in a Zone 7b, there are more varieties of flowers that will have a higher chance of survival - larkspur, phlox, bachelor buttons, queen anne’s lace, chinese forget-me-nots, calendula, clary sage - but we’re right on the cusp of hardiness for many of these. And if we get a cold spell, we can lose a lot of flowers as a result.
Generally speaking, if you don’t live in a USDA 6b hardiness zone (or higher), a fall planting may not be a good idea because you’re going to waste your time and effort on a lot of flowers that may not end up surviving.
(You can increase your chances of your flowers surviving to the point where you can get more to overwinter, but it does take quite a bit more effort and infrastructure. More on that later.)
If you look at the USDA hardiness zone map, you can see the extent of Zone 6b - the dark forest-green band running across the United States. Which means that most of the northern parts of the U.S. (mostly the Midwest and Rocky Mountain Region and going as far south as parts of northern Arizona, New Mexico, Texas, Tennessee and North Carolina) can’t really grow too many flowers that will be able to completely and reliably survive an average winter.
Can you try to fall plant? Of course you can. Can you have some success with overwintering some varieties that are above your hardiness zone? Of course!
But will you also have some frustrations and failures with this? The answer is yes. Will you get freak ice storms and cold snaps that kill off plants you’ve spent months babying and growing from seed? Sadly, yes to that.
As flower farmers, our business was dependent on those spring blooming flowers. And for several years we wasted countless seeds, resources, time and blood sweat and tears on trying to fall plant and overwinter those spring bloomers without realizing that for a lot of the varieties we were trying to grow it just wasn’t physically possible with the temperatures we were getting.
Other factors for overwintering
When it comes to overwintering, we have learned there are a couple factors that will help or hurt you.
Factors that can decrease your chances of overwintering:
High moisture levels (muddy, soggy soil)
Extreme wind exposure
Extreme temperature fluctuation
Factors that can increase your chances of overwintering
Moderate moisture levels (well drained or on the drier side)
Reducing wind exposure (natural windbreaks, manmade windbreaks, floating row covers/plastic)
Moderating temperature fluctuation (insulating through floating row covers/plastic, low tunnels, hoop house/polytunnels, heated greenhouses, thick layers of mulch, thick layers of snow)
How to increase your chances of overwintering
Moisture levels
First of all, good drainage is very important when it comes to overwintering. Wet, soggy, saturated soil is going to suffocate the roots of any plant, so if the soil stays on the drier side it will help tremendously.
Since we have a drier winter here (we only get a few inches between November to April) the chances of some varieties have a very high chance of surviving due to the fact that the ground stays dry. No moisture in the soil means no damage from rot.
Too much moisture is actually one of the main reasons why many people fail to overwinter from a fall planting - the increased moisture in the soil causes the root systems of plants to freeze solid. And many plants, once they’ve gotten to the temperatures below their hardiness for more than a day or two at a time will not come back - their roots will turn to mush when they unfreeze.
If you have a lot of precipitation during winter, you can help to decrease the chances of your plants’ roots rotting by planting them in well-draining soil. Some people mix in perlite or gravel with their soil to increase drainage, others place French drains, while others will mound up their garden beds to allow for rain and water to drain away from the plants. I’ve even seen some people put plastic over their plants for the purpose of keeping rain and snow off the soil and keeping it dry.
Wind exposure
While cold temperatures in and of themselves can be bad, cold temperatures plus extreme wind can be a terrible combo. It’s like the windchill factor in winter - it’s not so bad without the wind (you can tolerate 10 F right?), but with windchill it suddenly gets to -35 F, which is a lot less pleasant.
We find that although our temperatures are more moderate when it comes to winters, the wind has been a terrible factor in our field plantings that are exposed. Plants that are normally perfectly hardy in our zone end up unable to overwinter because of the wind damage.
Extreme winds do two things. First, they do end up making the surrounding ambient temperatures colder than they should be. It’s like blowing on a spoonful of hot food to cool it off - the wind will drop the temperatures of the air and soil around your plants much lower much more quickly.
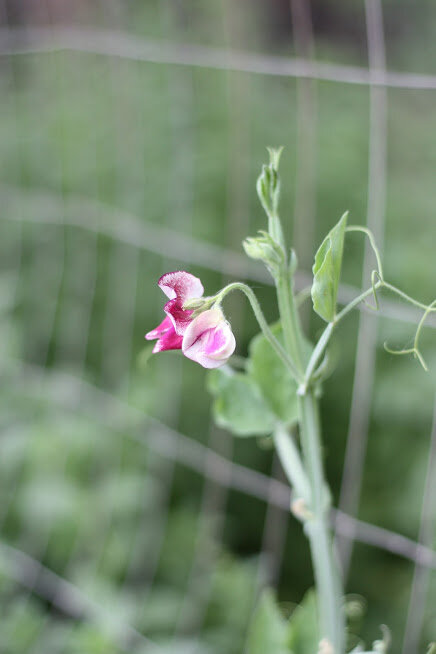
Secondly, winds will also dry out your plants. Any foliage or leaves that are above the ground will be dehydrated or desiccated by the wind, damaging them sometimes beyond repair. Sweet peas for example are very vulnerable to this damage, sometimes to the point of the plants dying.
To improve your chances of overwintering, protecting your plants from extreme wind will be important. You can help reduce wind exposure by planting in a protected area of your property, such as on the side of a building or fence, in a courtyard or walled garden. You can also plant windbreaks such as evergreens, shrubs, or grasses to reduce the amount of wind that blows through. You can also protect your plants by covering them with floating row cover, plastic low tunnels or even a greenhouse or poly tunnel as needed.
Extreme temperature fluctuations
Interestingly enough, there are some plants that do just fine if you get a cold winter and it stays cold. Because some plants (such as Icelandic poppies) are able to adapt to cold temperatures, so long as the ground remains cold and the air remains the same temperature, they should be able to survive just fine.
A problem comes up when the temperatures start getting warmer. Then getting colder. Then getting warmer, then getting colder again.
Why is that?
Well, fluctuating temperatures will cause the ground around your plants to freeze. Then thaw. Then freeze. Then thaw. And when this happens, it starts crushing and ripping apart your plants. As the water freezes in the soil and thaws, this reaction will also rip apart the roots of your plants.
This can get so bad in some cases where it can actually cause what is called frost heaving - where the repeated bouts of freezing and thawing will actually push a plant out of the ground. And that plant is not going to survive.
You can decrease the risk of temperature fluctuations by protecting the ground. Similar to putting on a thick winter coat, you can protect your plants and the ground by insulating them with a layer of something that will keep the heat in as much as possible. A thick mulch of leaves, straw, or pine needle mulch works well, while you can also cover the plants entirely with floating row cover or plastic.
NOTE: If you have a high tunnel or a greenhouse, you have a better chance of overwintering
A high tunnel or a heated greenhouse can help to give a bit more hardiness and protection for the flowers grown inside. Most professional growers have a high tunnel, which is an absolute game changer when it comes to growing spring blooming flowers to extend the season earlier than they would be growing and blooming outside (and alternately extending the season to extend later for a longer period of growing and blooms inside the tunnel).
That being said, not everyone can have a large structure like a high tunnel. Some people may live in an area that may not allow for the erecting of large structures. Other people may not be able to take care of them due to snowfall, extreme winds and so on. Or you may just not want to place a big structure in the middle of your garden.
There’s the fact that a high tunnel can also give you a false sense of security. Unless artificially heated, many high tunnels only have a limited ability to store heat and keep themselves warm during colder temperatures, which can cause loss of overwintered flowers due to sudden freezes and dips in temperatures. They also take a lot of maintenance, and here we can’t even use the high tunnel in the summer because it gets far too hot - even when opened fully for ventilation.
We don’t have a high tunnel anymore, but we still are able to grow (and overwinter) due to knowing our zone and our plants and what they need in order to survive and go on to grow into beautiful plants.
This is why fall planting (successfully) can be very difficult
So we have discussed there are a lot of factors that can lead to failure with fall planting of hardy annuals and biennials.
If you don’t get the moisture levels correct, protect your plants from wind, protect them from extreme temperature fluctuations, and (most importantly) live in the correct zone and grow the right plants, you’re going to be met with a lot of failure.
When we first started trying to overwinter spring blooming flowers I was super frustrated at the lack of success I had. Even in a Zone 7b, there were lots of failures my first couple of years because I was not able to meet all these requirements for the plants. If I made small mistakes when fall planting (not providing enough cover for example) I lost months of work in just a couple of days. Tiny little seedlings that I had coddled and grown for months were gone in a short period of time.
That’s frustrating.
And even when I did everything correctly, sometimes I would still have massive failures. Mother Nature is a force that you cannot control, and even when doing everything correct the success would not always be guaranteed.
Although I thought myself a failure at first for not being able to overwinter plants via fall planting, I soon stumbled upon a better idea: early spring planting.
A Solution: Early Spring Planting

So if you can’t overwinter, but you still want to have good spring blooming flowers, what’s the answer? Early spring planting!
While the results are not quite as spectacular as fall planting in some cases (in the perfect situation and environment) they will still allow you to grow those spring blooming flowers with plenty of time to establish their root systems and produce a very decent amount of flowers.
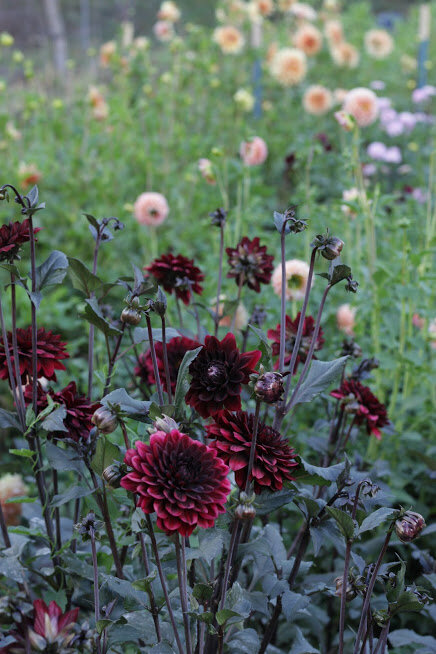
And we’re talking about the difference between 3’ tall bachelor buttons (early spring sowing) versus 5’ tall bachelor buttons (fall sowing). The majority of people have no need for 5’ bachelor buttons when the 3’ will work just fine for bouquets and arrangements (and in some cases be easier to handle since they don’t require as much support and will stay more upright!)
So we still want to get our flowers a good time period where they can sit and get a good long cool period so they can get established. But we also don’t want our flowers to freeze.
It will all depend on your conditions and temperatures of course - you’ll want to know your coldest average temperature and what time of the year it usually happens.
The Benefits of Early Spring Planting
Early spring planting has a lot of the same benefits as fall planting - and more! Basically, early spring planting still allows you to get a major head start on spring and ensures that you’ll have great spring blooming flowers before the heat of summer starts
Allows for a long period of cool establishment for increased productivity, hardiness and size
Allows for working in a slower time of year (as opposed to the spring) - a great winter and early spring project!
Allows for focus on spring-blooming flowers in winter, then focus on summer blooming flowers in spring
Can be done no matter which growing zone you live in, even if you don’t have any sort of hoop house or tunnel
Selecting Your Spring Flowers
When it comes to selecting your flowers for an early spring planting, you’re going to want to check with hardiness zones to ensure that you know what is hardy in your temperatures.
For example, in Zone 7b I know that I can plant anything hardy to Zone 7b and have good success. I also know that anything lower than that will survive as well.
I can also try to plant spring-blooming flowers in Zone 8a but knowing that there is a chance I could lose them entirely if the temperatures dip too low during the spring. However, the chances of low temperatures are fewer in the spring for us here and I can always cover them in extra floating row cover for a few days if I need to to keep them warm.
As a general rule, plant for your zone or lower - and you can try planting one zone higher to experiment and see if it works.

An in-depth post about the hardiness of hardy annuals and biennials
USDA 10/RHS H2: Didiscus, Freesia, Strawflower
USDA 10A-9B / RHS H3: Nasturtium, Cerinthe, Nigella hispanica, Rudbeckia hirta, Sweet peas
USDA 9A-8B / RHS H4: Scabiosa, Bells of Ireland, Statice, Phacelia, Ranunculus, Anemones, Dill, Stock
USDA 8A-7B / RHS H5: Clary sage, Calendula, Nigella damascena, Bupleurum, Linaria, Agrostemma, Foxgloves, Shirley Poppies, Violas and Pansies, Chinese forget-me-nots, Annual Baby’s Breath
USDA 7A-6B / RHS H6: Bachelor Buttons, Daucus/Queen Anne’s Lace, Ammi majus, Ammi visnaga, Annual phlox, Larkspur, Rudbeckia fulgida, Rudbeckia triloba, Cress, Clarkia
USDA 6A< / RHS H7: Icelandic Poppies, Orlaya, Dianthus
Cold Hardiness and Hardiness Zones
The USDA hardiness zones are based on the average low temperatures of your area. It can be reasonably expected that the average temperatures in your area are pretty accurate, give or take a few degrees.
That being said, it is the average temperature, and not the actual temperature that is given. Your actual temperature may dip far lower than that if you get a blast of arctic air and a cold front moves through (which seems to be much more common these days unfortunately).
You can plan however on the spring-blooming flowers that are hardy to your zone to stand a good chance of making it through. And even if there are some colder days, so long as they’re well acclimated to the colder temperatures they stand a decent chance of surviving just fine.
Starting your seeds indoors
The goal of an early spring planting is that you want your seeds to start growing well ahead of your last frost date (there would be no point if you started your seeds close to your actual last frost date - you might as well just start them outside in that case). And in fact for some of our seeds, we start them in November or December, especially if they take longer to grow (such as snapdragons and Icelandic poppies).
January is a good time to start thinking about starting your seeds, because it will give them a good amount of time to grow out before you need to plant them to take advantage of the cool weather of early spring. It will also allow you to start seeds for those flowers that need cold temperatures in order to germinate - larkspur, queen anne’s lace, ammi for instance.
For seeds that like that cold temperature that I mentioned above, you can sow them into their cells and place them outside to allow for the winter conditions to freeze and thaw the seeds in the soil, which will break the seed dormancy and allow them to start growing. Put them in a place relatively sheltered from wind, rain and secure them so they won’t be knocked over by forces of nature (including large naughty dogs that like to inspect seed trays and “help out”).
I’ll check on these cold-loving blooms every few weeks to ensure that they are still staying relatively moist and to check for any germination. The best part about these cold-loving plants is that once they start germinating, you don’t really have to do much - just let them continue to grow and we’ll plant them out in the spring.
For seeds that like a bit of heat (which is pretty much everything else) I recommend starting them in a warmer place. Although you can start them in a spare room in your home (or office, or your bedroom although I can’t guarantee that your spouse or partner will find it especially amusing) you can also start a lot of seeds very quickly and efficiently with a heat mat.
Why heat? Heat is the key along with moisture for getting most seeds going. The good thing about a heat mat is that the heat is very warm and consistent, which means that your seeds will germinate consistently and quickly. A heat mat is a little plastic mat with electric cables running through it that will generate heat (around 80 F, which is nice and warm) for anything set upon it, which includes seed flats.
If you just allow your seeds to germinate willy-nilly in the ambient temperature of your home, which is around 68-70 F (and it usually cooler if placed near a window, which is common). Some seeds may germinate, but not all of them - and by the time you get all of the seeds to germinate, the first seeds that germinated may have gotten very leggy and weak. If you use a heat mat, it ensures that all of your seeds wake up at the same time, allowing for them to all germinate uniformly.
There’s nothing better than looking into your seed tray and seeing those beautiful little seeds popping open in every single cell - the white, pearly roots poking out of the seeds, just ready to get going. Heat mats are the way to do it.
We also use a humidity dome on top of our seed trays to help keep the humidity consistent. This is important too, because seeds that dry out won’t make it. If they start germinating but then dry out, they will just be stuck, dying in their seed coats - you want them to be able to have a good, consistent amount of germination.
The humidity dome combined with the heat mat in essence creates a tiny little mini-greenhouse in your seed tray, allowing you to create the ideal conditions for growing seeds. I love this technique because it allows me to start hundreds of seeds in a little 2’ x 3’ - just a corner of my desk in the living room really - that gives me the same result as a flat of seeds grown in a professional heated greenhouse but for a fraction of the price and hassle.
NOTE: If you’re starting anemones and ranunculus (which are grown by corms) you’ll be able to start them in the same way as seeds. Start them off indoors where they can get a head start, then grow them out.
Now with these seedlings having been started indoors, they have started growing and will give us a head start on these spring-blooming flowers.
Grow your seedlings cool

The key to successful early spring seedlings is to do the majority of the growing in cool and bright conditions.
When we are getting the seeds to germinate, it’s only just the start of germination that we’re looking for. We’re not looking for leaves or even the initial shoots - we’re looking for seeds coming to life. This is usually shown as I stated early as the white tips of roots poking out.
This is the stage you want to catch your seedlings at, because you want them to grow into little seedlings under bright and cool conditions - the same conditions that spring would present.
If you were to keep your seedlings growing on the heat mats, you would end up with thin, leggy, weak seedlings that wouldn’t survive transplanting outside. You want your seedlings to stay short, stocky and squat and bushy whenever possible, which can only be achieved by growing them in a cold and bright environment.
Some people do start their seedlings on heat mats under lights, but given that we’re growing on a smaller scale and have limited indoor space (I miss our giant basements in the Midwest!) we only allow our seeds to germinate and then get them outside to continue to grow.
For instance, I started our sweet peas back in December and waited five days or so until the sprouts poked above the surface of the soil. Then I put them outside in a sheltered location - it gets to maybe around 20 F at the coldest - and they are continuing to grow. Slowly of course, but they are growing just the way I want them to with big fat leaves and short and stocky. This will make for great, healthy seedlings that can then be planted out in early spring.
Most of our hardier spring-blooming flowers will be able to continue to grow like this until we get them planted out. So instead of having to hold these indoors until we can plant them out, I can get them outside and allow them to grow the way they would out in nature.
The good part about this too is that our seedlings are naturally hardening off - getting used to being outdoors as far as temperature and exposure to wind and sunlight. Unlike fully-grown plants that are used to the balmy conditions indoors with tender, soft growth, these seedlings are tough and able to withstand dips in temperature and cold days - and will not skip a beat once transplanted out into the garden.
Now let’s say that you live in an area like Zone 4a and you’re dealing with not only freezing temperatures but also massive amounts of snow and freezing sleet that would prevent you from moving your seedlings outside. Since we’re in 7b we can move our seedlings outside, but you may want to look into different options for growing your seedlings out.
Again, cool and bright is key so growing under lights in a cool garage or room in your home would be a good way to do so. I’ve also seen people moving seedlings out onto a three-season porch or covered area of their outdoor living spaces, which works quite well.
If you have the ability to set up a cold frame, a small greenhouse or plastic-covered tunnel, these can also work well for growing out your seeds. They will require constant monitoring however, to ensure that they don’t get too hot - with direct sunlight the interiors can get up to 90+ F during the day! - and you’ll have to ensure that during the coldest spells they remain protected to ensure the more tender plants don’t freeze inside. This starts getting into more infrastructure than what we have, but it is definitely possible to have a small productive sheltered place to grow out your seedlings.
Planting Out Your Seedlings
When do you plant out your seedlings? For us, we do it as soon as we can. When the ground is workable (i.e. not frozen) and the temperatures are not too extreme (staying above the 20’s at night) we’ll plant out our seedlings.
This is actually really nice to be outside at this time because everything at this time of year is so quiet and clean. There’s no weeds to deal with, no bugs to endure, no humidity to cause you to get sweaty and gross. It’s quite pleasant!
We will plant our seedlings out when we get a warmer spell in the early springtime. It’s important to ensure that your seedlings are planted well and firmly into the ground - if the ground should freeze, you might experience some frost upheaval of your plugs - and then give them a good water to ensure that the soil is saturated around them and the seedlings are settled in.
Some people will plant into black landscaping fabric, which allows for good protection of your plants and generates some heat for the plants as well, keeping them slightly warmer. You can also mulch around your seedlings too to ensure that there is even less temperature fluctuation of the soil - leaf litter is great for this, but you can also use straw or pine needle mulch as well.
Adding protection for your seedlings
Inevitably, there will be a cold spell that comes along during the early spring and will try and zap our spring blooming flowers. And although we have had some pretty bad winters (for our zone at least) we’ve been able to protect them using just floating row covers.
Floating row covers (also known as garden fabric, garden fleece, just plain row cover or Agribon if you’re wanting to use the commercial name) are spun plastic sheeting that is used to cover plants to protect them from a frost. LIke a lightweight blanket, it can either be gently laid on top of plants or it can be placed on supports to create a tunnel for the plants underneath.
Floating row cover is awesome because it helps to do a few really important things to help your seedlings make it through cold weather.
Although it won’t protect your plants from freezing entirely, it will help to decrease the effects of lower temperatures to ensure that they have some buffer as you go into colder temperatures. If we see that we’re getting colder temperatures, I’ll go out and add an additional layer of floating row cover to further insulate our plants to help them get through the cold.
Floating row cover also helps greatly to reduce the exposure to wind, creating a great wind-block that helps keep the plants protected from the damage that can occur from freezing, drying winds. It also helps to keep the ambient temperatures warmer as well, since the wind can’t cut through the fabric quite as easily.
Floating row cover also helps greatly to ensure that the plants underneath don’t dry out. Although we worry about the cold temperatures in winter, winter is actually a pretty dry season - the air generally doesn’t hold a ton of moisture - so plants can also dehydrate and get a lot of damage as a result of the cold temperatures. Floating row cover on the other hand will keep plants succulent and moist because it traps in moisture, even during the middle of cold and dry days - allowing your plants to have a nice little greenhouse-like atmosphere that is really nice.
Now, I know that there are a lot of people who grow in plastic-covered hoop houses/polytunnels and some will even cover their seedlings in plastic. While these are great for generating heat, it does come with the problem that plastic does not breathe very well. As I mentioned earlier, when the sun is shining directly on the plastic, the interior can heat up very quickly to high temperatures even if the outside temperatures are low!. It could be 20 F outside, but 100 F inside your plastic enclosure - it’s the same reason why you don’t leave pets or children inside a sealed car on a hot day.
The problem also with plastic is that it can create an artificially warm environment. Let’s say that you have four weeks of really mild temperatures, where it doesn’t get much below freezing outside in some bizarre set of circumstances. This is great, and you’ll see your plants growing along happily, but then you’ll get news of a massive dip in temperatures the following week. As it drops down to 5 F, your previously happy plants are devastated from the cold temperatures and are killed off in a matter of days.
What happened here? Well, the plastic environment of the tunnel caused an artificially warm environment for your plants that through just the right set of circumstances created a nice little hot oasis for your seedlings to grow in.
The problem is that plastic isn’t that great of an insulator. Unless you heat it artificially, the temperature inside will start dropping drastically as you approach freezing, and will continue to drop. And because your plants have gotten used to the nice warm environment inside, they haven’t grown the enzymes and biological compounds to deal with cold since they’ve had such a nice and fluffy living so far. So your plants are suddenly plunged into freezing temperatures, have no adaptation or way of dealing with it, and they die.
Floating row cover on the other hand is a much better solution to this problem. While your plants may not grow as quickly or as lushly as under plastic, they will still be hardy and tough underneath the floating row cover, not having lost their ability to deal with the cold and keeping the biological compounds that prevent them from freezing and frost damage. If the temperatures dip lower, most of the plants are just fine underneath - maybe a little bit wilty here and there, but they pop right back up so long as the variety itself is sufficiently hardy.
You can also help increase your chance of success with row covers as well by installing plastic or metal hoops for the floating row cover to go on top of. This helps to create a sort of air bubble or dome above the plants, and will keep them even more protected.
The use of floating row cover pretty much allows us to plant our seedlings out in February, and then they will continue to grow in the protection of the floating row cover until they start pushing up against it - and then the covers can come off (usually in around April). We’ll keep the covers handy in case we have a late frost and need to drape it on top of the beds again, but for the most part the spring-blooming flowers take care of themselves at this point.
scheduling seed starting for spring flowers

If you live in Zone 4a or lower, you may want to treat your spring-blooming flowers similar to your summer-blooming flowers. I’m actually kind of jealous that you’ll be able to have a lot of the spring blooming flowers like sweet peas and ranunculus for a longer period than us! And in fact, some of our growers in cooler climates can grow spring blooming crops throughout their entire season. If your summer rarely gets above 80 F, you may be able to do this.
Even more importantly, you may not be able to plant anything prior to spring. If you live in Fargo, North Dakota for example (where the average temperatures in April are 16-52 F) you may not want to even start seeds until March (with the intent of planting out until April) because prior to that you may not be able to get much to survive due to the extreme cold temperatures.
Again, fast forwarding to the summer the high temperatures seem to reach around 80 F at their hottest, meaning that one could potentially grow a lot of spring-blooming flowers well into the summer because the usual issue of heat-induced dormancy is not an issue with plants stopping flowering or going into dormancy/ending their life cycle.
In this case, you may not really need the advantages of fall planting, since you don’t have to squeeze in your spring-bloomers prior to the heat of summer that comes on. And you can still grow summer-blooming flowers too, but you’ll have more overlap between your spring and summer flowers.
If you live in Zone 5a-6a, you will be starting a bit sooner than Zone 4a or lower. Since temperatures can get down to -20 to -15 F in a Zone 5a (colder than what spring-blooming annuals or biennials can usually tolerate) we recommend starting seeds indoors in around February. This will give you enough time to grow out your seedlings, but not so long that you have to keep larger-sized plants under lights or indoors - they should be ready to plant out in the end of March or April when things start warming up.
This of course will all depend on your weather. Obviously if you get a ton of snow that prevents you from accessing the ground in April, you will still be stuck with your seedlings since you won’t be able to plant them easily. Or, if you get a longer stretch of super-cold weather where it dips down below -5 you may not be able to successfully plant out your seedlings.
If the weather (or other circumstances) prevents you from planting into the ground, you may need to pot-up your seedlings into slightly larger containers to keep them from getting root-bound. Alternatively you can also grow them in cold frames or covered tunnels that will help to provide some protection and allow you to plant out despite the weather.
On the other hand if the weather is mild and you’re able to plant out earlier, do so. Know that while you won’t be able to grow your spring-blooming flowers all season long, you will have a longer spring than the group in 6b-7a.
If you’re growing in Zone 6b or higher, you are best suited for an early spring planting: Start seeds in January and plan on planting them into the ground come middle of February or March. This will again, give them time to get established and start growing in before the heat of the summer starts coming on.
The same strategies as in the other zones apply - if you run into some cold weather, make sure to give your seedlings good protection from the cold or even hold off on planting them into the ground by holding them in cells or pots. Alternatively if you have good and mild weather, your plants will grow very nicely and you will have a good harvest of flowers as a result.
Note that starting in zone 6b you have more choices available (bachelor buttons, queen anne’s lace, ammi, phlox, rudbeckia, cress and clarkia are all reliably hardy down to -4) which makes for a more diverse and (in my opinion) more versatile cutting garden.
Here in zone 7b we will even dare to plant some items that are technically more borderline like ranunculus and anemones as we get closer to spring - offering them additional protection as needed during the colder temperatures of spring.
In case you missed our previous post, check out How to Start a Beautiful Cut Garden
The ultimate guide to starting a flower garden specifically for cutting and enjoying