How to Grow Bachelor Buttons (Centaurea cyanus)
The first flower that I ever grew from seed were bachelor buttons.
It was the first spring at the house I was renting, and had received permission to start a small garden there. I had done some research as far as easy seeds to start, and had purchased a packet of bachelor buttons.
It seemed strange that the weird little grey seeds with their little hair-like tufts at the end would ever become really anything, but I planted them into a little bit of potting mix and waited for spring to come.
The seeds sprouted quickly, and soon sent up strappy silvery-grey leaves. I was a bit surprised at how easy they were - I had tried seeds in the past for vegetables, but never had started flower seeds before. The seedlings were incredibly vigorous, outgrowing their container in a few short weeks before getting planted outside.
And then came the massive display of bright blue flowers. Like tiny little bundles of bright blue crepe paper, the bachelor buttons bloomed all the way through June. I cut fistfuls of them to place into jars around the house, where they continued to bloom and display their bright colorful petals.
Growing bachelor buttons was like a welcome back home when we started flower farming. I knew bachelor buttons like an old friend, and found myself tucking the silvery-green stems into arrangements and market bouquets.
I love bachelor buttons. It may not be cool to say so, since I know that many flower farmers hate harvesting them, or many don’t even grow them at all, but they’ve got a lot going for them. They are such an easy flower to grow, withstanding frost and freezes, shrugging off our mild New Mexico winters with ease, often being the first plant to bloom of the spring annuals. Here are my tips on growing bachelor buttons.
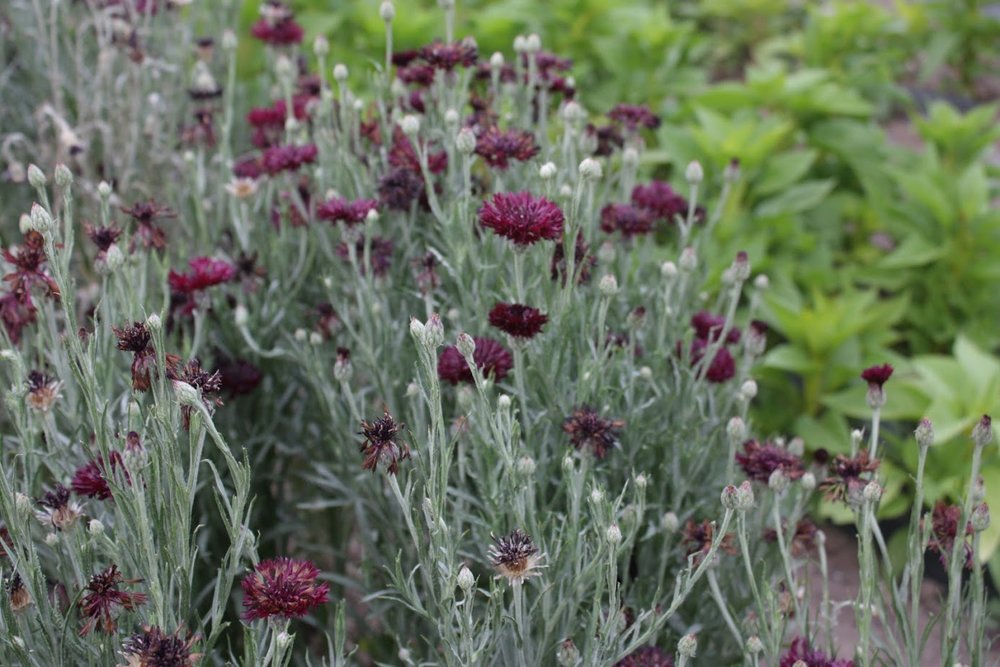
Bachelor Button ‘Black Boy’
Selecting your variety
Bachelor buttons come in many colors and mixes, the most common being the natural wild color of bright royal blue. We prefer growing the dark purple colored ‘Black Ball’ variety as well as the pure white ‘Snowman Ball’ variety for use in floral design, but there are also other mixtures of solids and marbled colors for a nice variety, such as Classic Magic and Classic Romance.
We are happy with our seeds from Geoseed, but Johnny’s Select Seeds, Floret and Swallowtail Seeds also carry a fine selection.
2. Scheduling
Bachelor buttons are a pretty quick flower, having just 65 days for growing from seed to bloom. You will want to plant them as early as possible, even when it is dipping below freezing at night just to allow them to establish a good system before it gets warm. Fall-sown or early spring/late winter sown bachelor buttons will have superior stem length and quality.
3. Seeding
Bachelor button seeds are easy given that they are so large and easy to handle. We plant ours into mini soil blocks, although you can also plant in 72 cell trays if you want large transplants. They should be up in a week or so when kept at 60-70 degrees, and they will grow very quickly so make sure to get them into high light as soon as possible - we tuck ours into a cold frame, but you can also grow them under lights. Try not to let them get leggy, although it isn’t impossible if they do get leggy.
If you’re good at direct sowing, you can put them directly into the field. We tend not to, since we’re growing on a smaller scale and have plenty of bird predation, but if you’re growing on a larger scale it may be easier and make more sense to direct sow.
4. Growing out
As I mentioned previously, bachelor buttons are like horses champing at the bit as far as their growth. If you’re not careful, they will grow up and out of the trays! I usually wait until they get their first set of true leaves, then immediately set them out to start hardening off to prevent them from getting leggy. This won’t take long, maybe a week or two before they’re ready for transplanting.
5. Planting out
Bachelor buttons transplants are also easy to handle (seeing a trend here?). We pop ours out into the field, burying them up to the level of the first set of true leaves. We tend to plant them in dense clumps, clustering several mini soil blocks around each irrigation emitter, as they will get nice and bushy after they’ve grown in. Make sure to water them in well and spray them with a bit of fish emulsion and kelp to give them a little boost of nutrients.
Make sure to pinch them as soon as you notice them having any vertical growth. If you don’t, you might end up with a giant central stem with a massive cluster of flowers. Which isn’t bad, but you’ll want to pinch low to get a lot of very productive side shoots, creating more of a spray effect of flowers.
6. Harvest
When you’re ready to harvest, you can choose one of two ways:
Cut each stem individually
Cut a “branch” of stems
Personally I prefer cutting a large branch of stems out - you just hunt down at the base for the stalk that the flowers you want are attached to, then chop the entire thing off. Much less combing through leaves and stems to find the one that you want, and if you’re doing a mass harvest for florists or events, it will make your harvesting much quicker and easier. Plus, if you need individual stems, you can just chop up the branch into the smaller pieces once it’s out of the plant and easier to handle.
Don’t worry regarding butchering this plant - it will grow back quickly and vigorously. It’s actually impressive just how fast the bachelor buttons will grow back to be honest, and continue to produce. Bachelor buttons are one of the longest flowering spring annuals as well, blooming for around ten weeks before petering out (although our first summer growing we actually harvested all the way through November!)
It’s important to keep bachelor buttons deadheaded - even if you’re not going to use them, make sure to keep the flowers harvested to prevent them from going to seed (which shuts down the flower production of the plant) as well as to ensure you don’t cut old flowers.
We usually end up ripping out our bachelor buttons in June to make room for other flowers, but if you have the space, bachelor button flowers are wonderful to use in floral crowns and garlands and as placeholder flowers later in the season, since they do pretty well out of water (just make sure to cut off the stems of course). They are also a great addition to floral confetti when dried.
Easy, productive, and simple - bachelor buttons are oftentimes overlooked as cut flowers, but they are a great staple to have for filling bouquets, arrangements as an accent flower, and are very useful as a dried flower as well. I will probably always grow them due to sentimental reasons, but I hope that this has kind of warmed you up to them!
If you’re interested in flower farming and are interested in learning how to grow bachelor buttons and other cut flowers as a business, check out our eBook series on growing cut flowers for profit and success!
Growing Cut Flowers for Florists
