Garden: Natural Dyeing, Part II: How to Dye Your Own Silk Ribbons
As we mentioned in our previous post, we stumbled upon dyeing our own silk ribbons quite by accident, and have learned quite a bit by trial and error along the way.
There unfortunately aren’t a lot of resources out there on dyeing silk ribbon, so we put together our process of how we dye our silk ribbons.
Different Textiles Produce Different Colors
It’s important to note that different textiles will result in different colors when placed in the same dye. For instance, cotton will produce one color, while wool will produce yet another color and silk will produce yet a different color - sometimes widely different from each other.
This caused a lot of grief for us initially since we were trying to create dyes off wool natural dyes - which dye very differently compared to silk. Both are animal proteins, which dye very well on their own (compared to say, cotton or linen) but both take up the dyes differently.
Given that we focused mostly on silk ribbons, we’re focusing on how silk dyes with natural pigments for the purposes of this guide :)
There are two types of silk that you’ll want to know about regarding dyeing silk ribbons - habotai and crepe de chine.
Habotai
Habotai is the classic silk that you’ll find used in basic clothing, scarves and art projects. It’s the most economical and straightforward silk to work with, and the best part is that it is generally already pre-cut as ribbon on rolls, ready to dye without any preparation or trimming or tearing.
Habotai is the shiny, glossy thin silk. It always reminds me of ballerina slippers - it has that sort of satiny glossy look that catches the light and shine.
Note that habotai ribbon usually comes with a seam end - the diagonal line where one sheet of silk has been stitched to the next one. It’s not super noticeable for most people, even when being used as a long trailing ribbon, but it does give it a very different appearance than a ribbon made completely of one sheet of silk.
If you’re new to dyeing, I would recommend starting with habotai - it’s cheap, precut and premade, and you can make a lot of mistakes and still make it look good.
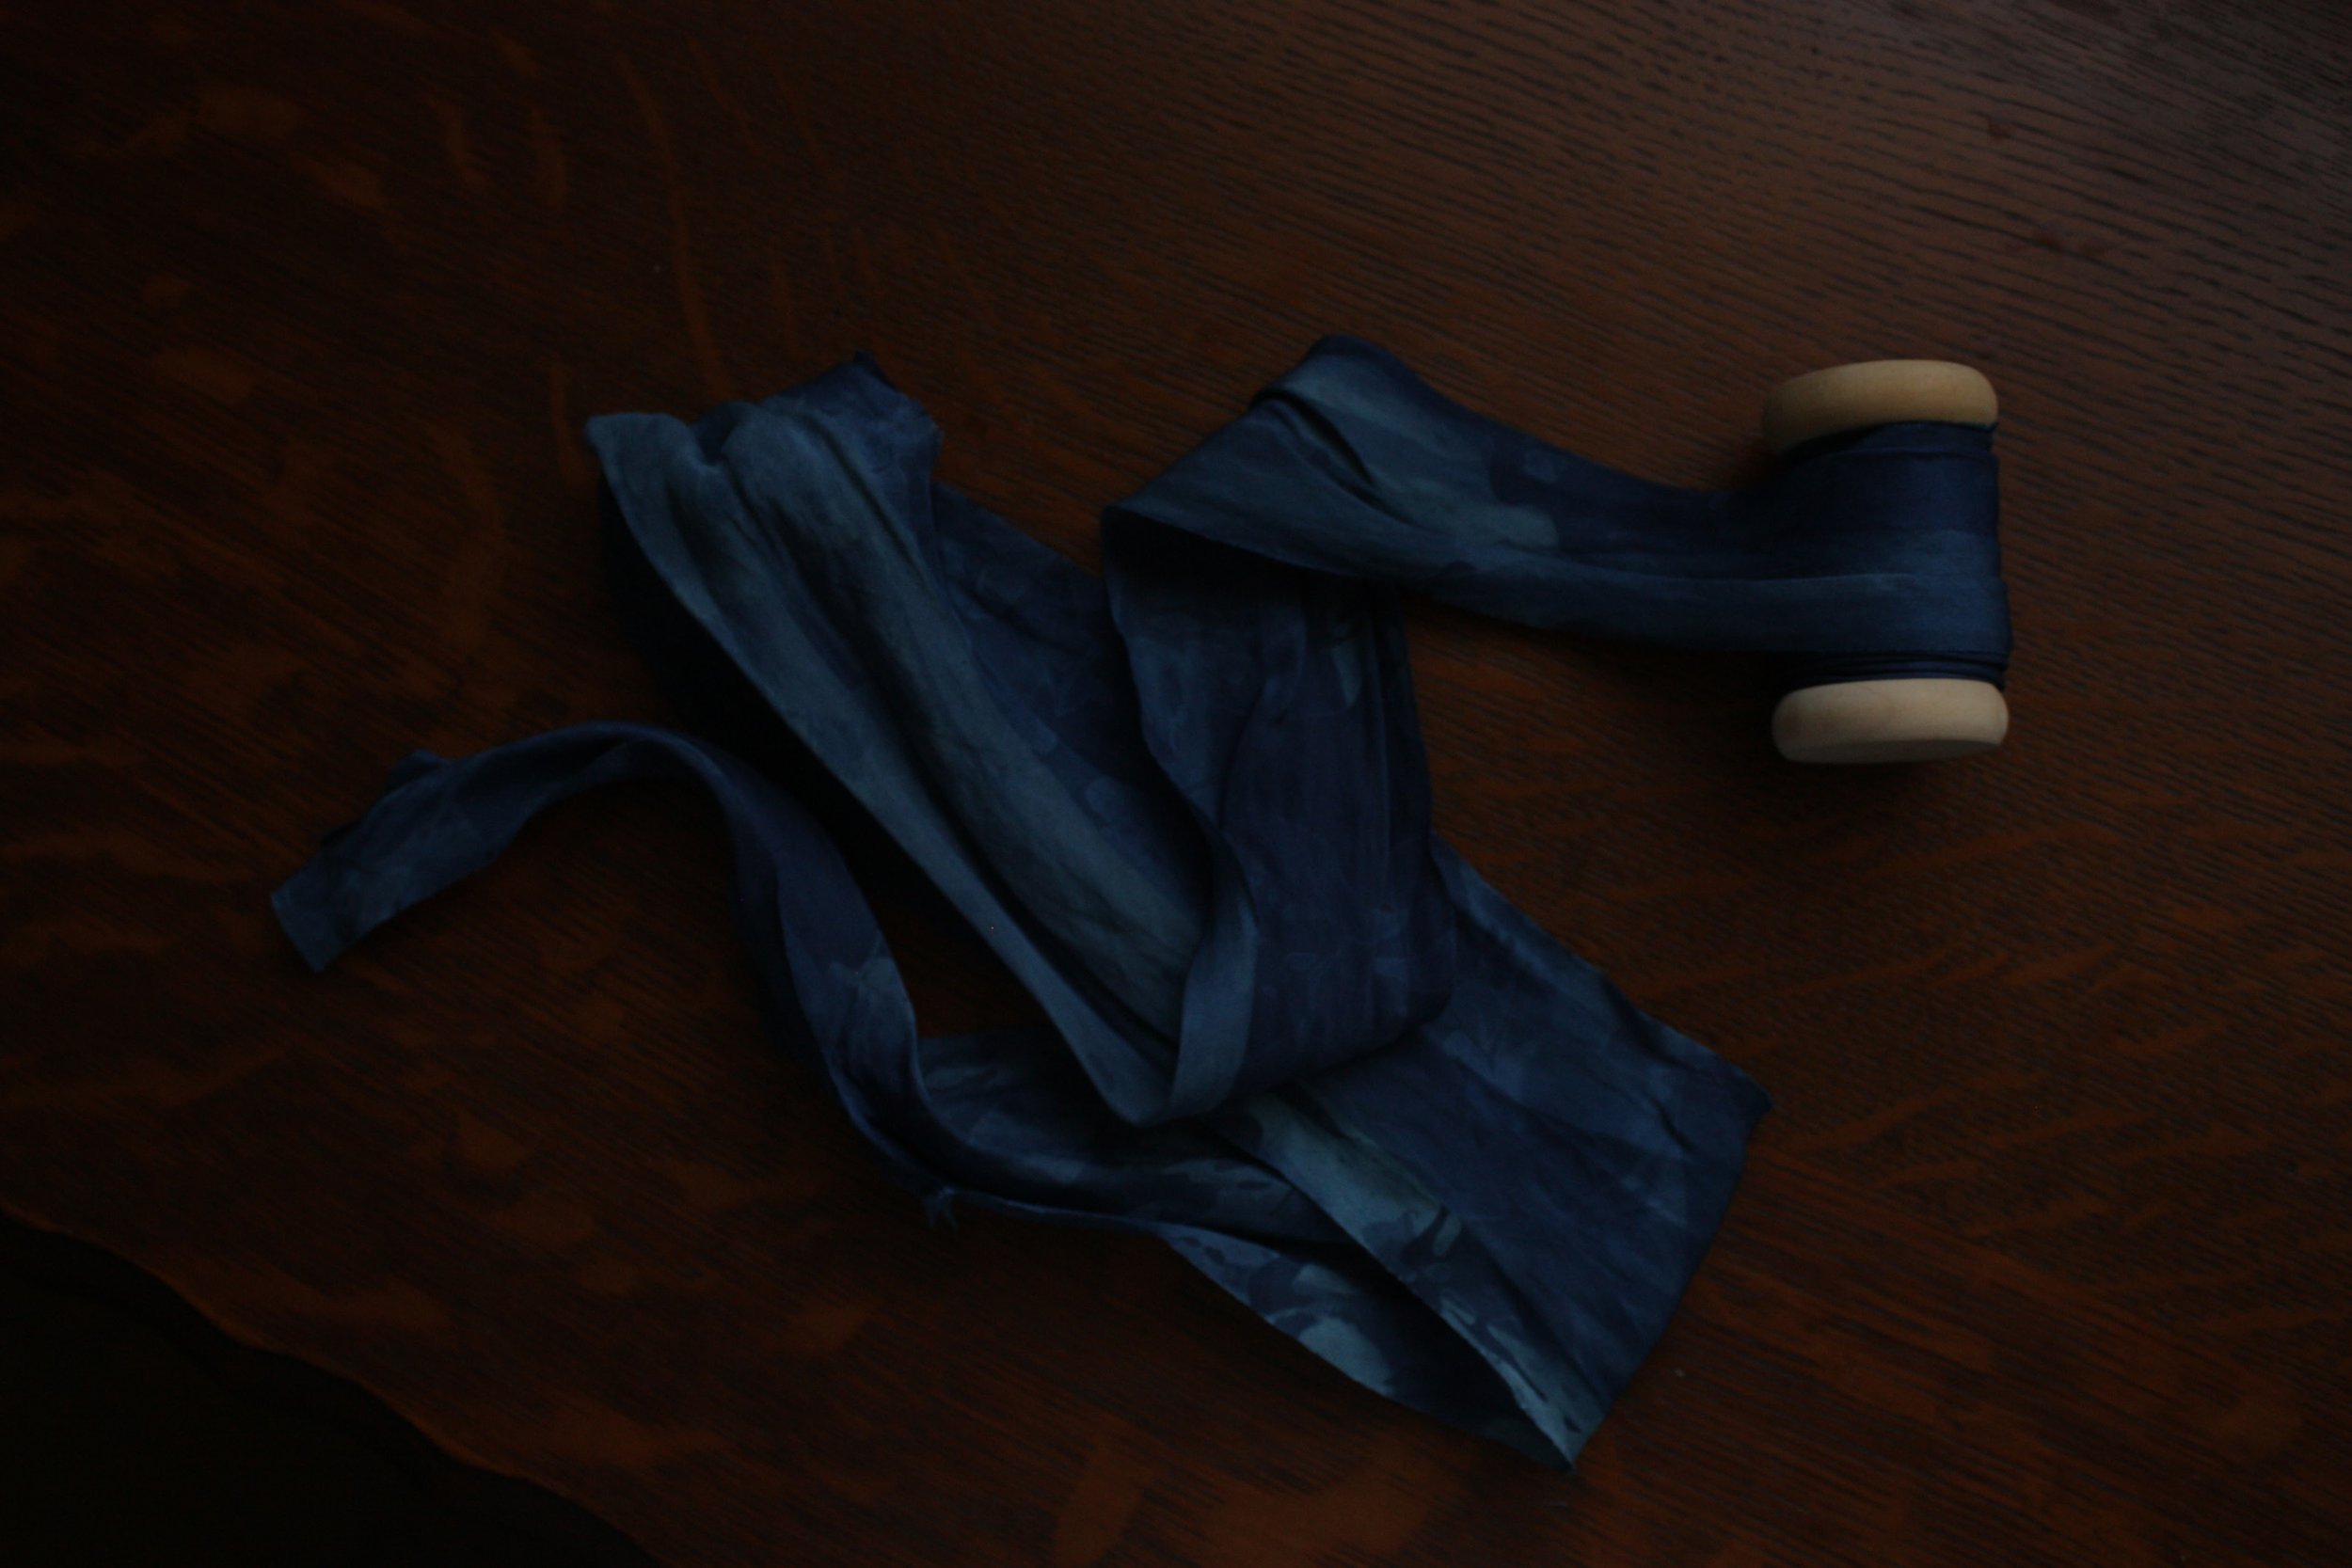
Habotai silk ribbon, dyed with indigo
Crepe de Chine
Crepe de chine is our favorite silk to use for ribbon. First of all, the way the silk flows and spills is absolutely amazing - it just flows through your hands like smoke, spinning and tumbling smoothly and has a gentle and graceful drape. Crepe de chine is one of the higher-end silk fabrics, and is used for making clothing and high-end scarves, which is why it works so well as a ribbon textile.
The appearance of crepe de chine is beautiful too. While habotai veers a bit towards too shiny and flashy, crepe de chine is anything but flashy. It is light, gauzy, perfect in its form and habit with just a touch of a pearly sheen when viewed in the correct light.
Crepe de chine does not come in the same pre-cut ribbons that habotai does. Instead, you order crepe de chine in a long roll or bolt of silk. Because of this, crepe de chine needs to be torn into individual ribbons.
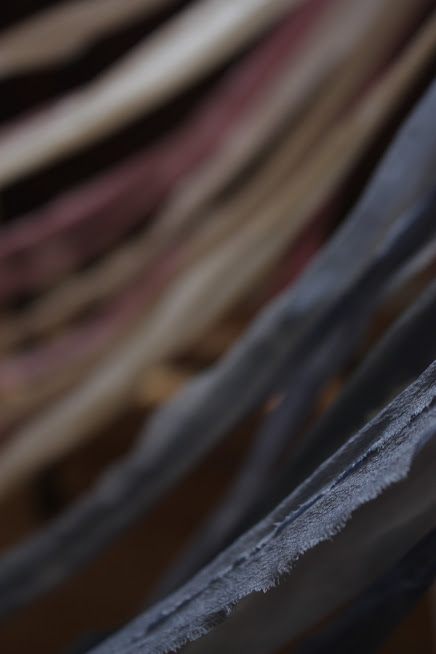
Interestingly enough, crepe de chine tears very easily into nice and straight ribbons (tearing silk ribbons has to be one of the most satisfying sensations in the world). The current trend is for an unfinished edge - termed the “eyelash fringe” due to the way the unhemmed silk threads appear like soft little eyelashes at the edge of the ribbon - and it allows for the silk to really flex and move in a very graceful manner.
We find that crepe de chine is the best of all worlds - it’s economical enough to make ribbons from while at the same time giving the feel of a luxurious and special product - which is why we opted to create all of our silk ribbons from crepe de chine.

Crepe de chine silk ribbon, dyed with madder root and black beans
The Dyeing Process
The basic process of dyeing entails five stages
Preparing the silk
Mordanting (or pre-processing)
Dye bath
Washing
Drying and finishing
Preparing the silk
If you’re dyeing silk ribbons, you have two options - you can either dye an entire section of silk one color to be torn into individual ribbons later, or you can tear the silk into individual ribbons first and dye them individually. Note that this is for silk that you purchase as a large bolt or roll of fabric, such as crepe de chine - if you’re buying habotai, it usually comes already precut into ribbons, so your only choice is to dye each individual ribbon.
Generally speaking, you’re going to want to ensure that your individual ribbons stay as intact as possible - the less that they spread out or loosen during the dyeing process, the less you’ll need to untangle later on - but you’re still going to want to ensure the dye can penetrate the entire roll of ribbon. We accomplish this by loosely rolling the ribbon, flattening it so that it’s more looped that a tight roll which will allow for liquid to penetrate easily and for the dye to be evenly distributed.
It’s very important that you clean and wash your silk prior to dyeing. Even if it came prepared, you’re still going to want to clean and wash it to ensure that all dirt, oils, chemicals and packing materials are out of the silk so they don’t cause any defects in the dyeing process.
You accomplish this by doing some laundry - washing the fabric in a gentle, all-natural laundry detergent. Don’t use Tide or Shout - you’ll ruin your fabric. Choose a natural laundry detergent - we personally prefer Seventh Generation.
You’ll want to air-dry your silk afterwards. Note that we usually experienced the loss of a couple of inches of fabric during the washing and drying process, so if you’re aiming for a specific length of ribbon, give yourself six inches to a foot longer so that you’re not losing too much length on your ribbons.
The Dye Bath
The dye bath itself is one of the most important parts of the dyeing process as you might expect. There are two things that must occur during the dye bath
It’s important to ensure that you have enough dye in your bath in order to have enough pigment to dye all of your silk. As a general rule, a 1:! ratio of dye to fabric weight will give a good saturation of color - and if needing a lighter color, add less dye, or a darker color, more dye.
Your dye bath for the most part should also be heated up in order to get the dye “active”. As you know, if you wash a stained piece of clothing on high heat and then throw it in the dryer, that stain will be affixed to the fabric permanently since it denatures the proteins of the fibers and fixes the stain into it.
We first heat up our dye bath until it is simmering, allowing for the dye to become hot. We then place our rolls of silk ribbon into the dye bath (or bolt of silk if we’re dyeing a large piece for production) and let it fully immerse into the liquid.
We usually let the silk rest in the dye bath for at least ten minutes - less if we’re hoping for a lighter color, more if we’re hoping for a saturated color. You’ll find that at some point, the silk doesn’t take up any more of the dye - even if it looks like there is still color left in the dye bath.
Mordanting and Fixing
Most pigments aren’t able to “stick” to silk or textiles. Although you may have stained your clothing with red wine, coffee, mustard, grass and Sharpie marker, chances are that even over time those will fade.
To fix dyes into fabric, it requires processes at the beginning and at the end of the dyeing process to get the pigment to stick. These two processes are known as mordanting and fixing respectively.
Mordanting (coming from the Latin term mordere, which means “to bite”) is a substance that allows for the dye to really penetrate and stick to the textile during the dyeing process (as opposed to just washing off the material).
While you can use many materials as a mordant, we prefer the use of powdered alum with silk. Out of all the mordants, alum is the least toxic (a big concern when dyeing) is very economical, and is the most effective in fixing the dye. You can also keep it as a dried powder form, which makes mixing up a batch of it very easy.
To fix dyes even further after the dyeing process, we wash the ribbons in a very hot water bath afterwards. Similar to how you should never wash a dirty item of clothing in hot water because it will affix the stains, the heat further fixes the dye into the textiles.
Drying and Finishing
It’s important to let your ribbon dry after having fixing the dye and then washing the excess off. Drying will further help the color to fix into the silk and get it ready for future use as well.
When you’re drying, it’s important that you’re doing it in a very clean room. We use fans to circulate air around, so if there is any particular matter - dust, debris, or especially pet hair - it will get stuck onto and into your silk. Make sure that you vacuum the room well before you start, and continue to vacuum so long as you’re drying ribbons in the room. Try not to position the drying area in front of any return vents either - this will help to prevent your silk from getting blasted with dirt or dust from the vents.
It’s also important to ensure that the floors are scrubbed and mopped and dried before you start drying your ribbons as well. Although we keep a very clean house, we would still clean the floors until they were sparkling clean before drying ribbon. Inevitably when handling ribbon, one end will touch the ground - and if it gets covered in dust and dirt, you’re going to have a hell of a time getting that out.
We don’t recommend using a clothes dryer to dry your silk ribbons. First of all, tumbling your ribbons will damage the structure of the silk, causing it to stretch and tear unnecessarily. There’s also the fact that if you tumble dry your ribbons, they will become hopeless tangled among each other and amongst themselves. Don’t do it - just air dry your ribbons.
We sometimes will let our ribbons completely air dry, but there are oftentimes that we will start ironing them when they are just damp (not wet) and put them away after that. This may be the case if we’re making a large volume of ribbons all at once, so that they aren’t covering the entire area.
Ironing is very important - it gives it that final polish and sheen that transforms it from dyed fabric into a beautiful immaculate shiny ribbon. When pressed and dried, the silk takes on another form, almost having a pearly sheen to it that is just absolutely fabulous. We will usually iron and then immediately roll them onto spools or bobbins to keep them orderly.
Lastly, there is the major issue of frays on the edge of silk ribbon. I’m not talking about the eyelash edge that occurs during the tearing of ribbons into individual sections - I’m talking about the big, long strings of silk that inevitably come loose during the washing and dyeing process. It’s important to pick these off - just grab a loose end and pull until it comes off, but you don’t to leave it on there, as it will catch and get stuck on everything. You want a clean ribbon that has no stray strings or bits.
When storing ribbon, it is also important to ensure you keep them in an airtight container. Not only can dirt and dust get onto them if they are stored out in the open, but they can also attract Tineola bisselliella -the dreaded clothes moth, which can destroy an entire collection of silk ribbons before you know it.
It’s also important to keep silk out of light and moisture. Light is the biggest enemy of natural dyes, with some dyes (the berry-based dyes in particular) fading very quickly in sunlight, so you’ll want to store it in a dark place. Moisture can cause ribbons to stick to each other, the dye to redistribute and appear as water spots, so keep it dry as well.
Lastly, a helpful tip that we’ve found is to make a note of the recipe that you used for your ribbon. When we had to recreate our grey avocado pit recipe, it was really terrible - we couldn’t remember how many avocado pits we had used or what mordant we had used, and we ruined a couple of ribbons before finally recreating the recipe. Make it easier for yourself by writing down a quick note that you can slip into the container.

Equipment and Instruments
For the most part, natural dyeing can be accomplished with common household items.
For your dye extracts, powders, mordants and other dry ingredients, we recommend storing them in glass - mason jars work perfectly for this purpose. Just make sure to label them correctly so that you don’t accidentally add the wrong pigment to your bath or mordant with iron instead of alum.
You’ll want to ensure that you protect yourself when working with dyes. Although most of the chemicals and dyes that we use are relatively safe as far as dyes go, you’ll want to have personal protective equipment available, mainly in the form of gloves, eye protection through goggles or a face shield, and a face mask or respirator.
The gloves need to be sturdy and should cover your entire forearm (and not just your hands) to prevent any issues with splashing. We usually pick up a pair of the extra-strong dishwashing gloves (which we have yet to replace). Always use caution when working with any of the ingredients mentioned - the iron in particular can be particularly strong.
For the actual dye bath itself, we usually use a large stock pot to mix and hold the dye in. You’ll want a very large container with a lot of volume so that your ribbons have room to move around and swim in the dye. It’s better to have too large a container than too small of one, so that you can have more room to move the silk around.
For grabbing the silk and moving it around in the baths, we recommend some long handled tongs. Nothing too fancy, just some cheap tongs will do fine. We recommend a plastic or plastic-covered set, since a metal set may start rusting which will cause contamination of your dye process.
You’ll also need a separate container to perform the washing and rinsing portion of the dyeing process. We actually really like the plastic Proconas you can find at the wholesaler, because they hold a lot of liquid, have easy-to-grab handles, have a nice slot on the side for straining out the water and are a lot of times free when you shop at the wholesaler. If you don’t have Proconas, then you can use any sort of plastic bucket or water-retaining vessel.
For drying ribbon, we found that clothes drying racks worked very well. Set in a room with some standard box fans blowing the air around, our ribbons would dry quickly and evenly with very little effort. We’ve also used tall garment racks - like the kind that would be used to hang clothing on as a freestanding garment rack.
When you’re ironing the ribbon afterwards, you’re going to want to invest in a high quality iron. Not one of those cheapo very basic irons - they’ll do an okay job of ironing in a pinch, but if you really want to get a nice and smooth finish, a high-quality and sturdy iron is going to be a necessity.
It goes without saying that an ironing board is going to be in order, which you probably have. You may want to invest in an ironing pad and cover just for ironing your ribbon on - so that you ensure you don’t get any other contaminants onto the board from other clothing items.
We haven’t had luck with steaming ribbons well - they just don’t seem to get that nice flat and smooth texture like they do with a traditional hand iron. I’ve heard of some people being successful with them. I think that a steaming chamber might work better, but we’ve never made that investment.
For rolling ribbons, we recommend using clothespins or wooden spools. Although you can roll ribbon on its own, the clothespins or other sort of bobbin makes your life a lot easier. Wooden clothespins hold ribbons nicely and are very economical, but you’re going to want the old-fashioned ones with the round heads and long clips (without the metal spring).
Lastly, we’re going to talk about the thing that you’re probably the most excited about - sources of natural dyes in the third post in our series: